What are the rules for a passport picture?
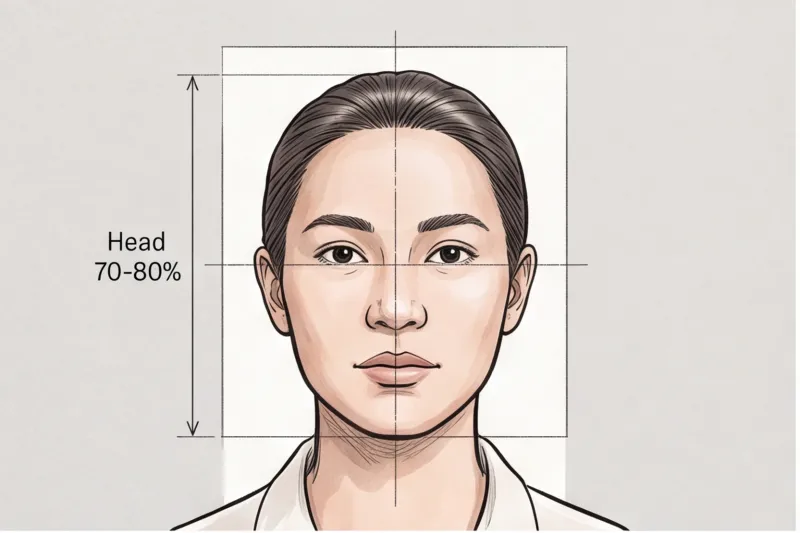
The fundamental rules for a passport picture require you to face the camera directly with a completely neutral expression, set against a plain, light background with perfectly even lighting. Meeting these precise passport photo requirements is mandatory because modern document photos are no longer just visual identification; they function as biometric data.
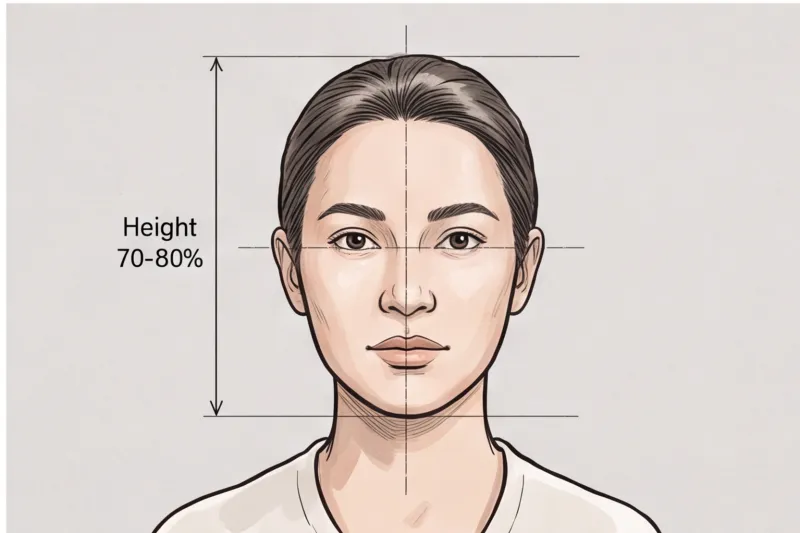
Every day, thousands of travel documents are delayed because of minor photographic errors—a faint shadow on a wall, a slight smile, or an unnoticed digital filter. The international framework governing these strict rules is the International Civil Aviation Organization (ICAO) Doc 9303. This global standard defines exactly how machine-readable travel documents must capture your facial geometry. Border control scanners map the precise distances between your pupils, nose, and chin. If you smile, tilt your head, or stand in uneven light, those measurements distort, and the automated biometric verification fails.
While specific print dimensions and file sizes vary significantly by country, the core ICAO-aligned principles apply to almost all global travel documents. Though enforcement can vary by local authorities, adhering to the following universal rules is the most reliable way to prevent application delays:
- Posture and gaze: You must face straight to the camera with your head centered and shoulders perfectly square. Your eyes must look directly into the lens without tilting your chin up or down.
- Expression: Maintain a strictly neutral expression. Your mouth must be closed with no smiling, frowning, or raised eyebrows. Both eyes must be fully open and clearly visible.
- Background: Shoot against a plain, light, and uniform background (typically stark white or light grey). There can be no patterns, textures, visible objects, or other people in the frame.
- Lighting: The illumination must be entirely even. Harsh shadows casting across your face or dropping onto the wall behind your head are leading causes for rejection. The image must have natural skin tones with no red-eye or lens glare.
- Recency: The photo must reflect your current appearance, which typically means it must be taken within the last 6 months. A few countries restrict this to 3 months, so always verify your destination's exact timeline.
Crucially, you must submit an authentic image with no digital beautification. You cannot use smartphone filters, skin-smoothing applications, or heavy retouching. While removing a temporary blemish is generally acceptable, altering your facial features or applying a color-correcting filter will cause the file to fail technical compliance checks. Rather than risking a rejection by guessing at home, utilizing our professional service, PhotoID24, allows you to upload a standard photo and receive an image that automatically meets the official technical requirements for your chosen document in minutes.
Sizes and Formats: Is there a global passport photo size?
No, there is no single global passport photo size. While the core rules for facial expressions and lighting are fairly universal, the physical dimensions of the document photo vary drastically depending on the country and the specific document you are applying for.
In practice, assuming that a "standard passport size" works everywhere is one of the most common reasons foreign visa or passport applications are rejected. If you take a standard European passport photo to an embassy requiring a square format, the application system will immediately flag the incorrect aspect ratio.
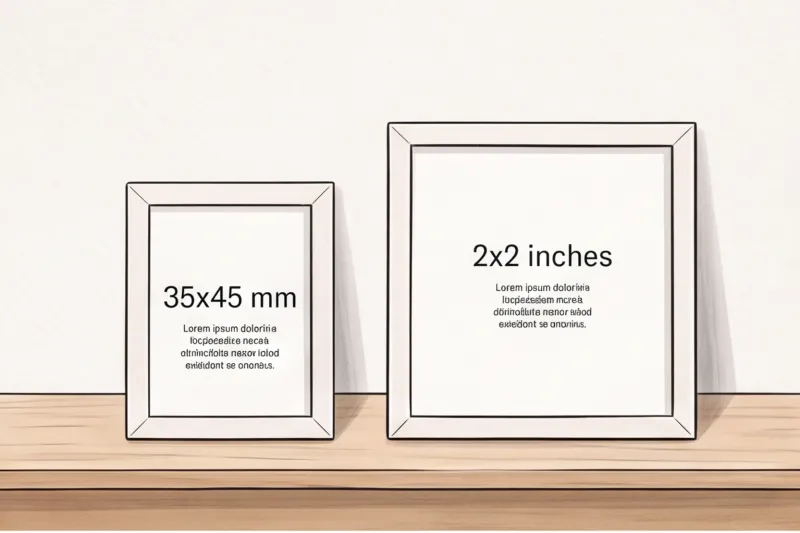
Here are the most common formats used across different international authorities:
- 35 × 45 mm: This is the most widespread format globally, broadly aligned with international standards. It is used across most of Europe, the UK, Australia, and many other nations.
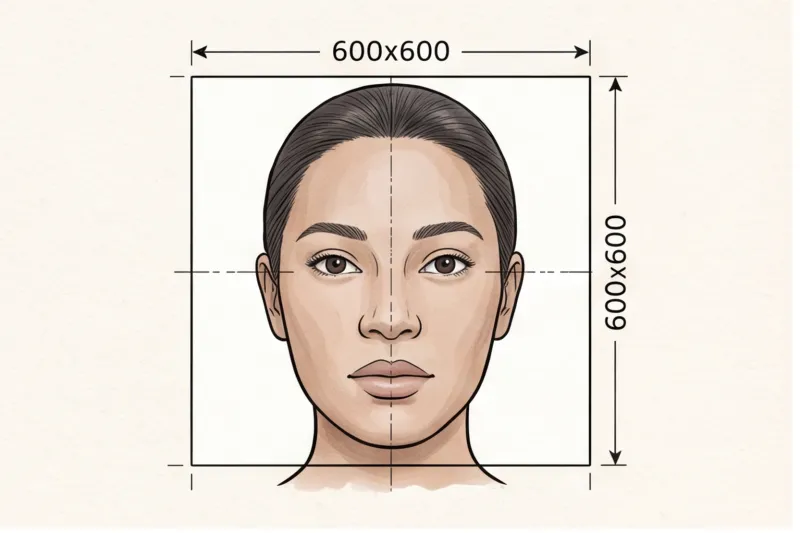
- 2 × 2 inch (51 × 51 mm): This square format is strictly mandated by the U.S. Department of State for all United States passports and visas. It is also required for several other international documents, such as Indian visas.
- 33 × 48 mm: This narrower, vertical format is the standard for Chinese documents, including the Chinese visa.
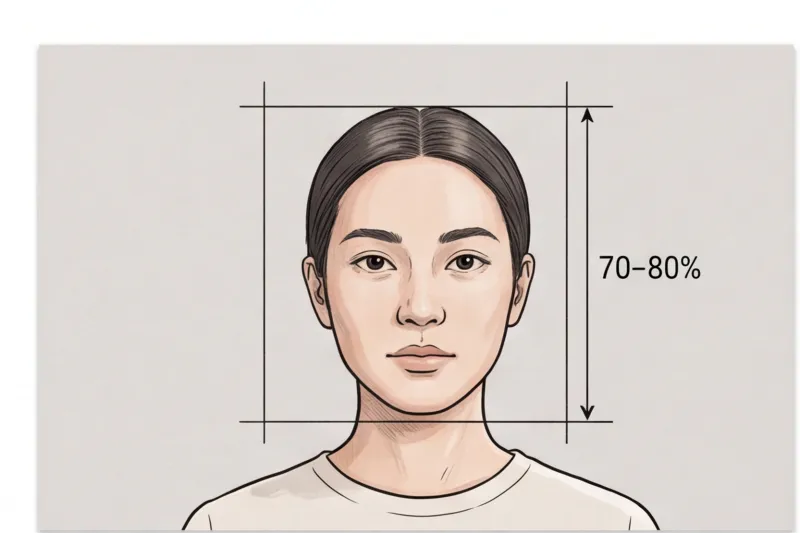
Getting the outer dimensions correct is only the first step. The internal crop — specifically the head-height ratio — is just as strictly regulated by authorities. In most standard formats, your face must fill roughly 70–80% of the frame height. However, the exact allowable measurement from the bottom of your chin to the crown of your head is entirely country-specific. If your head is too large within the frame, or if there is too much headroom above your hair, the photo will fail the biometric scan.
Because there are dozens of other active formats globally (such as 35 × 40 mm or 50 × 70 mm), you must always check the exact technical requirement for your specific destination and document type before preparing your image. A standard high-street photo kiosk will usually only print the format native to the country where the machine is located, which does not help if you are applying for a foreign visa.
To avoid dimension and cropping errors entirely, simply select your required country and document from the PhotoID24 catalog. Our professional service guarantees compliant formatting tailored to the exact millimeter.
Get your document photo in 2 minutes
Upload a normal selfie and receive a compliant document photo that meets the official technical requirements for your country and document — ready to print or submit online.
Make my photoWhat will get a passport photo rejected?
The most common reasons a passport photo is rejected are non-neutral facial expressions, visible shadows on the background or face, and poor technical quality such as blur or obvious digital retouching. Because authorities use automated facial recognition systems to verify identities, even a minor deviation from the official biometric rules will cause your application to fail.
Based on our experience processing large volumes of document photos, rejections are rarely caused by the camera itself. Instead, they stem from environmental setup and posing mistakes. In practice, a visible shadow cast on the wall directly behind the head is a top reason for home-photo rejection.
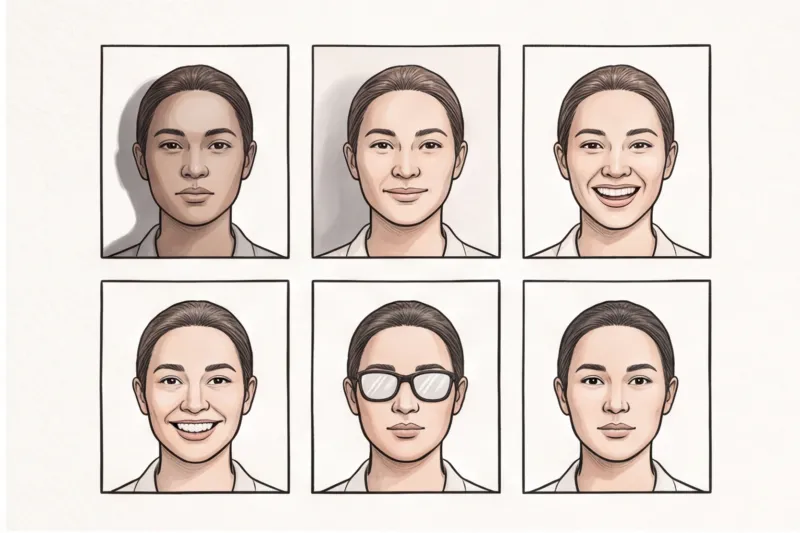
When a passport or visa application is returned due to the photo, it almost always points to one of the following critical failures:
- Non-neutral expressions: Document photos are strictly utilitarian. Smiling, frowning, raised eyebrows, or keeping your mouth open alters your facial proportions. Your expression must remain entirely neutral.
- Eye visibility issues: Both eyes must be fully open and looking straight into the camera lens. Photos with half-closed eyes, a diverted gaze, camera flash "red-eye", or hair falling across the eye area will be rejected instantly. Glare on lenses or frames covering the eyes are also major triggers, which is why many governments now ban glasses entirely.
- Background and lighting failures: The background must be plain, uniform, and light (typically white or light grey, depending on the country). Textured walls, patterned wallpaper, or visible objects will invalidate the image. Lighting must be perfectly even across your face. Harsh directional light that leaves one side of your face dark, or casts a silhouette behind you, will fail the biometric check.
- Head size and crop errors: If your face is positioned too close to the lens, too far away, off-centre, or tilted, the image falls outside the strict head-height ratios required by the destination country's standards.
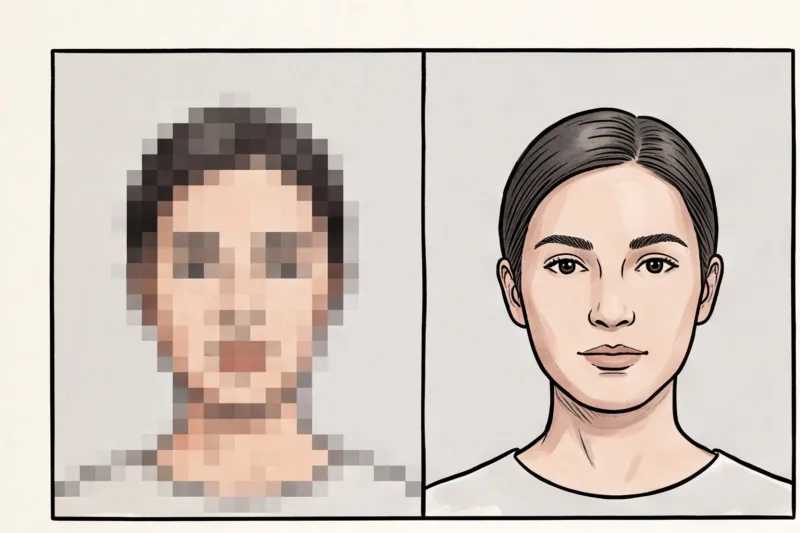
- Poor technical quality: Photos that are blurry, out of focus, highly pixelated, or degraded by heavy JPEG compression cannot be used. If submitting a physical application, printing the image on standard office paper rather than the specified matte or glossy photo paper will also result in a rejection.
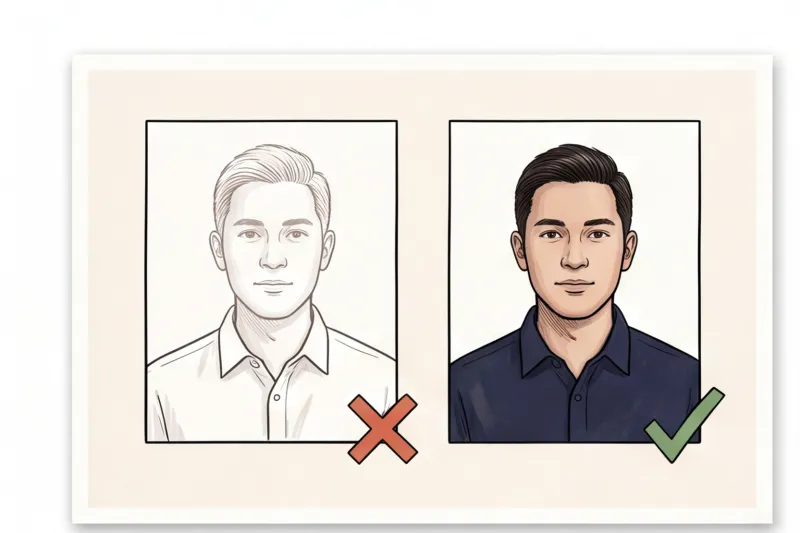
- Digital manipulation: Smartphone filters and beautification apps are strictly banned. Smoothing skin, altering facial shapes, or artificially removing the background with consumer editing software is prohibited. The photo must be an accurate, unedited representation of how you look.
- Outdated appearance: Authorities generally require photos taken within the last 6 months. Supplying an old photo that no longer matches your current appearance will delay your application.
Navigating these stringent requirements manually can be frustrating. We explore the specifics of fixing these issues in our dedicated articles covering shadows, background rules, precise head size formatting, and correct photo editing. However, the safest route is to avoid these manual adjustments altogether. By uploading a standard selfie to PhotoID24, our professional service automatically crops, aligns, and formats your image in minutes, ensuring it meets the exact official technical requirements for your destination and bypassing the common traps that cause rejections.
What are the passport photo requirements for makeup and appearance?
For a passport photo, your everyday appearance is acceptable provided it does not interfere with facial recognition technology. You can wear makeup and style your hair normally, but you must not use digital filters, extreme cosmetic contouring, or uniforms, and your entire face must remain clearly visible.
Biometric scanners verify your identity by measuring the exact distances between your eyes, nose, mouth, and chin. Because of this, the photo must look exactly like you on a normal day. Applying digital filters or using beautification features on your phone to smooth skin, reshape your jawline, or alter your eye color will result in an immediate rejection. The image must be a true, unaltered representation of your current features.
When applying makeup, natural is the strict rule. Makeup is fully allowed, but it must not alter your facial structure or skin tone significantly. A typical mistake when preparing for a photo is using heavy contouring to define cheekbones or narrow the nose; this creates artificial shadows that confuse biometric software. Similarly, excessive highlighter can cause unwanted glare on your skin. Blemishes can be naturally concealed, but do not attempt to change how your face fundamentally looks.
- Voluminous hair: Having large or voluminous hair is fine, provided it does not force your face to be zoomed out so far that it fails the country-specific head-height ratio.
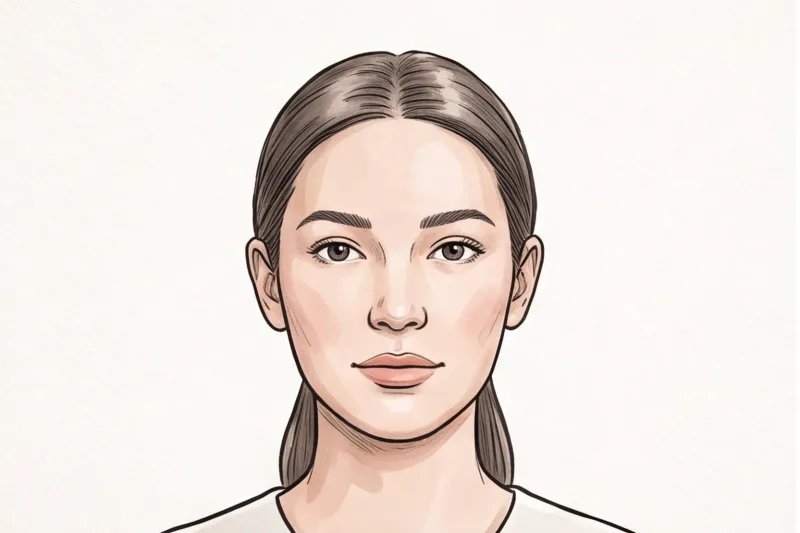
- Face visibility: Hair must never cover the face or obscure the eyes. Sweep fringes or bangs to the side if they drop below your eyebrows, and ensure your hair does not cast shadows on your cheeks.
Head coverings are generally prohibited, with strict exceptions. Most authorities allow head coverings only if they are worn daily for documented religious or medical reasons. Even with an exception, the covering must not cast any shadows on your face, and your complete facial outline — from the bottom of your chin to the top of your forehead — must remain entirely visible. Always check your specific destination's official authority, as some require supporting documentation for medical headwear.
Finally, uniforms are universally banned in passport and visa photos. This includes military, law enforcement, and flight crew uniforms, as well as tops that closely resemble a uniform or feature camouflage patterns. You should simply wear plain, everyday clothing that contrasts cleanly with the plain white or light grey background.
Ready to prepare your document photo?
Skip the studio. Upload a selfie and get a professionally prepared photo that meets the official technical requirements in about two minutes.
Get startedHandling Glasses, Hearing Aids, and Medical Exceptions
You must remove your glasses for almost all modern passport and ID photos, while medical devices like hearing aids are generally permitted. Authorities worldwide have phased out glasses to ensure that biometric facial mapping remains completely unobstructed by frames or lens glare.
The U.S. Department of State, GOV.UK, and most European Union passport offices now strictly ban glasses in document photos. In the past, they were permitted if there was no visible glare. However, in practice, reflections, tinted transition lenses, and thick frames covering the edge of the eye caused massive rejection rates. Because of this, our default guidance is absolute: take your glasses off. You may only keep them on if there is a strict medical necessity — such as recent ocular surgery that forbids removing them — and you will typically need to submit a signed doctor's statement alongside your application.
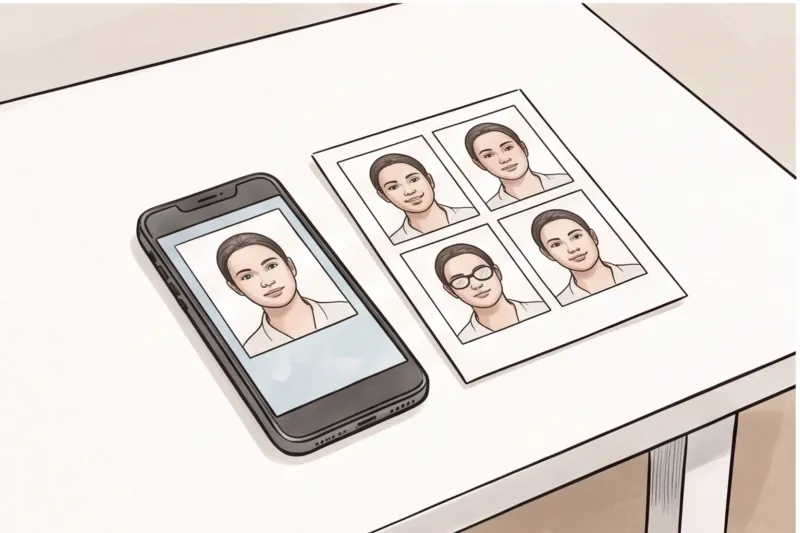
If you wear a hearing aid or a cochlear implant, you generally do not need to remove it. These devices are permitted by official standards, provided they do not obscure your facial outline or cast harsh shadows across your cheeks or jawline.
For other medical or disability exceptions, the accommodations are strictly regulated and differ by destination. If a permanent or temporary medical condition prevents you from opening both eyes, maintaining a closed mouth, or sitting squarely without support, you must check the specific exemption rules provided by that country's official authority. Never assume an exception will be granted automatically; supporting medical documentation is heavily required to bypass standard biometric requirements.
Navigating strict biometric rules does not have to be frustrating. You can prepare your image at home and upload it to PhotoID24. Our professional service will automatically crop, size, and ensure your image meets the official technical requirements for your specific country and document in just a few minutes.
Special Cases: Taking Photos for Babies and Children
Babies and young children must follow the same core biometric rules as adults, though many authorities relax the requirements for a neutral expression and open eyes for newborns. However, the fundamental framing rules remain strict: the photo must feature only the child against a plain, light background, with no toys, pacifiers, or supporting hands visible in the frame.
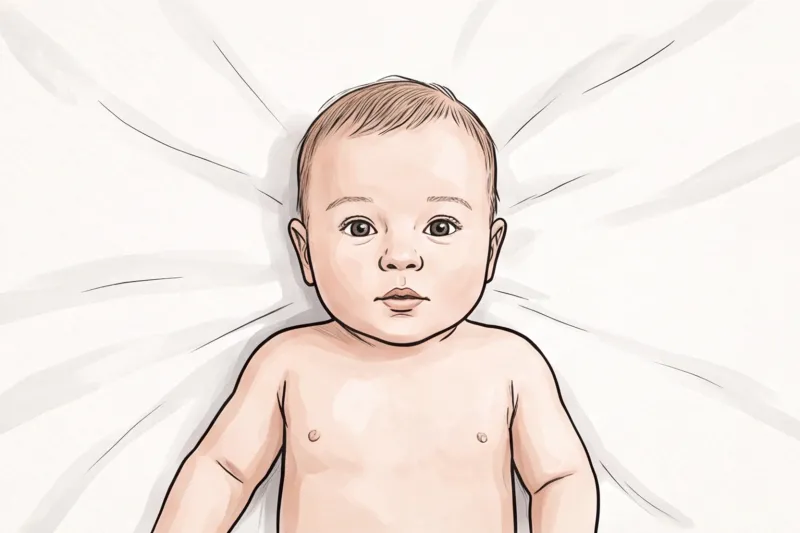
In practice, keeping a newborn upright and completely still is difficult. The most effective method is to lay the baby flat on their back on a plain white or light grey sheet, ensuring the fabric is smooth and free of wrinkles. You can then shoot the photo from directly above.
A typical mistake when shooting a baby from this angle is the photographer accidentally blocking the light. Ensure you do not cast a shadow over the baby's face or the background. To avoid this, position the baby near a large window for natural daylight, stand slightly back so your body does not block the light source, and use your smartphone's optical zoom (such as 2x) rather than hovering directly over the child.
While many national authorities make exceptions if an infant's eyes are closed or their mouth is slightly open, pacifiers (dummies) and comfort items are universally banned because they obscure facial features. If you need to support the child's head, you can place a small rolled towel under the sheet, but your hands absolutely cannot appear in the final image.
For toddlers and young children, the standard rules apply more strictly. Their eyes must be open and looking directly at the camera lens, and their mouth should be closed where possible. There can be no other people in the picture. If a young child is sitting on a parent's lap for support, the parent must be entirely hidden from the camera's view — including their hands and clothing. Getting a young child to look at the lens can be challenging; briefly holding a small visual cue just above the camera often helps direct their gaze at the exact right moment.
Get your document photo in 2 minutes
Upload a normal selfie and receive a compliant document photo that meets the official technical requirements for your country and document — ready to print or submit online.
Make my photoHow do I make a 2x2 photo (or any size) for my passport at home?
Taking a passport photo at home requires capturing a well-lit, properly distanced source image, rather than trying to format the exact dimensions yourself. You need a room with natural daylight, a plain light background, and a camera positioned at eye level about 1.5 metres away. Once you have a clear, high-quality picture, professional tools handle the strict sizing and biometric formatting.
To get the best raw image, stand facing a window that provides indirect, natural daylight. This creates the even, balanced illumination that passport authorities require. Stand roughly 0.5 metres away from a plain white or light grey wall. In practice, a typical mistake is standing with your shoulders pressed directly against the wall, which casts harsh, dark shadows behind the head — a guaranteed rejection trigger. Stepping forward slightly allows light to fall behind you, eliminating the shadow entirely.
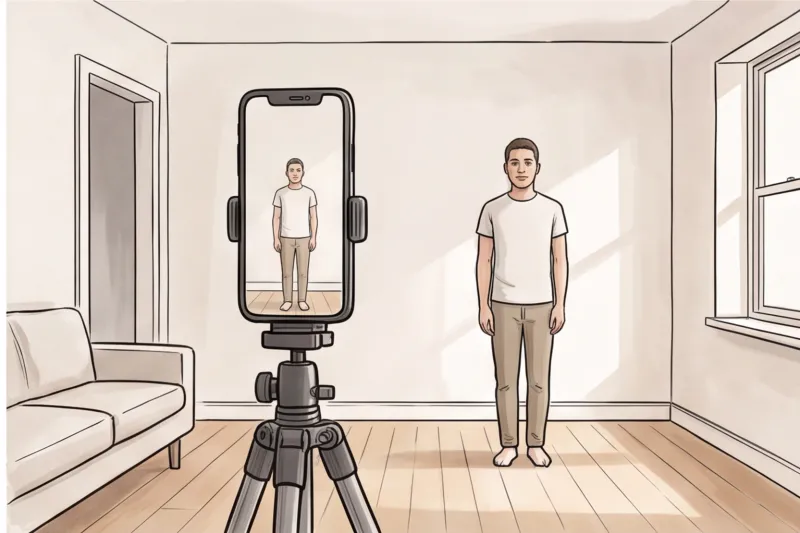
Ask a friend to take the picture or set up a tripod. Position the smartphone exactly at your eye level. Looking up or down at the lens alters your facial proportions and fails biometric geometric checks. The camera must be placed roughly 1.5 metres away from your face. Taking a standard close-up selfie with your arm extended introduces wide-angle lens distortion, making your nose appear larger and distorting your true appearance. Always use the rear-facing camera for better focus, keep your shoulders square, and look straight into the lens with a neutral expression.
Once you capture a sharp shot, do not attempt to crop it manually. Every country enforces rigid measurements that go far beyond the outer border. While you might know you need a 2 × 2 inch (51 × 51 mm) photo for the United States or a 35 × 45 mm photo for the United Kingdom, the internal head-height ratio is equally strict. In most ICAO-aligned countries, your face must fill exactly 70 to 80% of the vertical space. Measuring the precise distance from the bottom of your chin to the crown of your head using basic desktop software is difficult and highly prone to error. A crop that is off by just a few millimetres will be rejected by the processing authority.
Do not risk your application timeline on a manual crop. Use our professional service, PhotoID24, to guarantee compliance. Simply upload your well-lit home picture, and our system automatically crops, sizes, and formats it to the exact official requirements of your chosen country in minutes. Whether you need a digital file sized correctly for an online portal or a ready-to-print sheet, you get a professional result checked against the rules, completely bypassing the frustration of DIY measuring.
Digital vs. Printed Submissions: What You Need to Know
Whether you need a digital file or a printed photograph depends entirely on your country's specific application process, with each format carrying strict, distinct technical rules. Online submissions require exact pixel dimensions and file weight limits, while physical applications demand specific photographic paper types and identical, borderless prints.
Many governments now accept or mandate online applications, which rely heavily on automated photo-checking systems. For these digital submissions, you must meet exact pixel parameters and strict file-size caps. The United States Department of State, for example, requires a digital image measuring a minimum of 600 x 600 pixels for online uploads. If your file is too heavily compressed to meet a portal's maximum file-size limit — resulting in heavy JPEG artifacts or pixelation — or if the overall pixel count is too low, the system will block the upload before an immigration officer even sees it. Maintaining good sharpness and focus when formatting a digital file is critical.
If your application channel requires physical photos, the print medium is just as strictly regulated as the biometric image itself. In practice, printing your passport photo on standard office copy paper is an instant rejection. You must use dedicated, high-quality photo paper. Furthermore, the exact finish matters: some authorities mandate glossy paper, while others strictly require a matte finish to prevent scanner glare when they digitize your application. Unless specifically requested by the issuing authority, prints must be cropped cleanly with no white borders. You will typically need to submit two completely identical photos, meaning they must be printed from the exact same digital source at the exact same time.
Navigating the transition between a digital file and a physical print without accidentally altering the strict head-height ratio or degrading the resolution is a common stumbling block for home setups. This is where a professional service eliminates the guesswork. When you use PhotoID24, our service automatically generates a fully compliant digital file formatted to the exact pixel and file-size requirements for your specific online upload. Additionally, the result includes a perfectly sized, print-ready sheet that you can print on photo paper — or, where offered, you can select physical delivery of printed sheets direct to your door.
Ready to prepare your document photo?
Skip the studio. Upload a selfie and get a professionally prepared photo that meets the official technical requirements in about two minutes.
Get startedGlobal Passport Photo Checklist: Before You Apply
Before submitting your passport or visa application, you must verify that your image meets both the universal biometric standards for lighting and expression, and the exact sizing rules of your destination country. Meeting these official technical specifications is crucial, as a non-compliant photo is the primary trigger for costly application delays.
In practice, immigration and passport authorities do not overlook minor photographic errors. If a shadow obscures your jawline, your expression is slightly relaxed into a smile, or your head size is two millimetres too large for the frame, the processing stops. You will receive a rejection notice, forcing you to start the photo process over while your travel dates approach. Verifying your photo against a strict checklist ensures your application remains on track.
Review your final image against this universal biometric checklist before you apply:
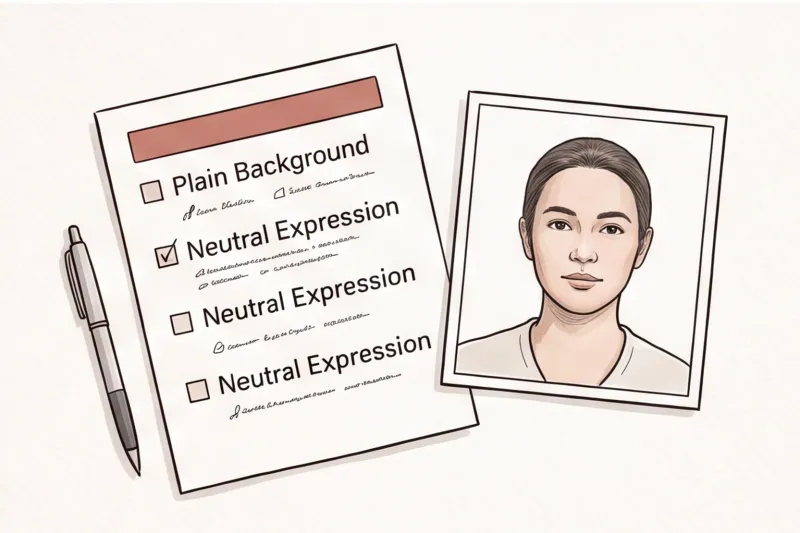
- Neutral Expression: Your mouth must be completely closed with no smile, frown, or raised eyebrows. Both eyes must be fully open, level, and clearly visible to the camera.
- Even Lighting: The photo must have balanced exposure. Check carefully for harsh shadows under your nose, shadows on the wall behind your head, or reflective glare on your skin.
- Plain Background: Ensure the background is entirely uniform, light-coloured (typically white or light grey), and completely free of patterns, texture, shadows, or other objects.
- Current Appearance: The photograph must be recent, typically taken within the last 6 months. If your appearance has changed significantly, you must take a new photo.
- Zero Digital Alteration: Do not use software filters, beauty enhancement tools, or aggressive retouching. The image must be an accurate representation of you in real life.
- Unobscured Face: Hair must not cover the edges of your face or fall across your eyes. Glasses should be removed entirely, as they are now banned by many authorities to prevent lens glare and frame obstruction.
Once the image passes the universal biometric check, you must confirm the specific format. Never assume a standard size applies globally. Sizes vary drastically by destination — from 35 × 45 mm across most of Europe and the UK, to 2 × 2 inches (51 × 51 mm) for the United States. Furthermore, you must verify whether your specific application channel requires a high-resolution printed photo on specialized paper, or a digital file with strict pixel and file-size limits. Always consult your destination country's official authority to confirm these exact dimensions and head-height ratios.
Attempting to manually crop, resize, and format a photo to meet these exacting specifications at home is difficult and prone to error. Don't risk application delays. Use PhotoID24 to ensure your document photo meets all official technical requirements instantly. By uploading a standard, well-lit selfie, our professional service automatically adjusts the crop, size, and background to perfectly match the official rules of your chosen country in minutes, leaving you with a compliant digital file or a perfect print-ready sheet.
Guide Chapters
What to Wear for a Passport Photo to Avoid Rejection
Learn the golden rules of choosing your outfit for a biometric passport photo. Find out which colors work best to avoid application rejection.
DV Lottery Photo Requirements to Avoid Rejection
Thousands of Diversity Visa entries are disqualified every year due to incorrect photos. Discover the exact digital image rules you need to follow to pass the screening.
Passport Photo Online Renewal: Rules & Tips
Digital portals use strict biometric scanners for your passport photo online renewal. Learn the essential rules to ensure your uploaded picture is accepted.
DS-160 Photo Requirements: Guide for US Visas
Discover the strict DS-160 photo requirements for your U.S. visa application. Learn the exact dimensions and rules to avoid submission errors.
Citizenship Photo Requirements: A Complete Guide
A citizenship photo must meet strict biometric standards before your application is approved. Discover the exact rules you need to follow for a compliant naturalization picture.
Passport Photo Pixel Size & Resolution Guide
There is no universal standard for digital passport photos. Discover how to find the exact pixel dimensions and resolution required for your specific country.
Passport Photo Checker: How to Meet Requirements
Discover the essential biometric rules for travel documents. Learn how verifying your image with a passport photo checker can help you avoid rejections.
Can You Wear Makeup in a Passport Photo? Rules Explained
Find out what the official rules say about wearing cosmetics in your passport photo. Learn how to achieve a natural look that passes biometric checks.
Can You Wear Earrings in a Passport Photo? Rules
Find out if you can wear earrings and other jewelry in your passport photo. Discover the official guidelines to ensure your picture gets approved.
Hair Passport Photo Rules: Avoid Rejections
Wondering how to wear your hair for a passport picture? Discover the official biometric rules to ensure your face is fully visible and your application is accepted.
Beard Passport Photo Guide: Rules & Requirements
Find out if you can have facial hair in your passport picture. We explain the international biometric rules for beards and mustaches.
Hijab Passport Photo Rules & Requirements
Yes, you can wear a hijab in your passport photo. Discover the official biometric requirements to ensure your face is properly visible.
Passport Photo Examples: Why Photos Are Rejected
Discover the most common reasons your document application might be denied. Learn how to avoid biometric and technical mistakes.
Infant Passport Photo Rules & Tips for Parents
Every baby needs their own travel document. Discover the official rules and practical tips for capturing a compliant infant passport photo.
Global Passport Photo Dimensions & Size Guide
There is no single global size for document pictures. Discover the correct passport photo dimensions for your specific country to avoid application delays.
Passport Photo Editing Rejected? Here's Why
Find out why editing or using filters on your passport photo causes it to be rejected. Learn how biometric scanners read your facial geometry.
Passport Photo Head Size: Avoid Application Rejections
Many passport applications are delayed because the face occupies the wrong percentage of the frame. Discover the strict internal geometry rules for official photos.
Smiling in Passport Photo: The Neutral Expression Rules
Find out why a non-neutral expression is the leading cause of application rejections. Learn the exact rules for achieving a perfect passport photo.
Why Passport Photo Shadows Cause Rejections
Submitting an image with passport photo shadows is a quick way to fail your application. Learn how to adjust your lighting to meet strict official standards.
Passport Photo Background Rejected? Here's Why
Discover the strict biometric standards behind official document photos. Find out why even a slight shadow or texture can cause your application to be delayed.
Why Passport Photos Get Rejected (And How to Fix It)
A denied picture can delay your travel plans for weeks. Learn the strict biometric rules behind document photos and how to avoid an automatic failure.
Glasses in Passport Photo: What Are the Rules?
Discover the official rules for wearing spectacles in your travel documents. Find out why removing your glasses is the safest choice globally.