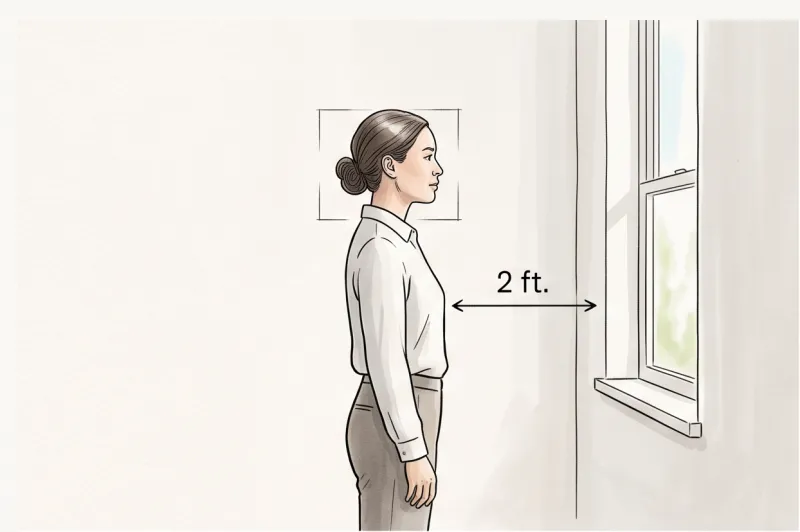
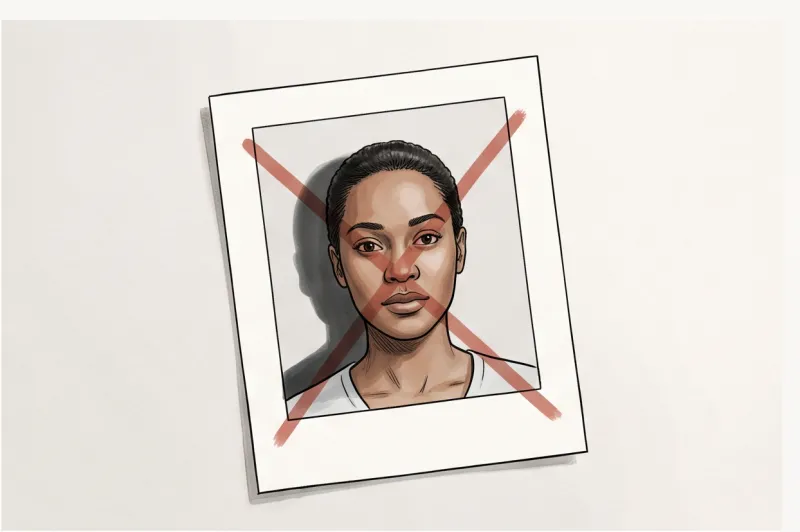
Why do passport photo shadows cause automatic rejection?
In practice, one of the fastest ways to fail a document application is submitting an image with passport photo shadows. Shadows cause automatic rejection because an official document photo is not a traditional portrait — it is a secure biometric data file designed to be mapped by facial recognition software. Any uneven lighting disrupts this highly sensitive mapping process instantly.
The strict rules governing these images originate from ICAO Doc 9303, the international standard for machine-readable travel documents that most national passport authorities base their requirements on. This standard explicitly requires perfectly even lighting across both the applicant's face and the background. When a strong light hits your face unevenly from a single window or a harsh overhead bulb, it casts dark areas under the chin, beside the nose, or across the cheeks.
To a biometric scanner, these shadows create false edges. The software algorithms misinterpret a dark shadow as a physical contour or boundary of your face. This artificially alters the geometric distances between your key facial features. If the exact measurement between your eyes, nose, and mouth is distorted by a shadow, the scanner fails the image and the authority rejects the photo.
This technical failure has immediate real-world consequences. A single rejection for poor lighting stops your application in its tracks, delaying your travel documents and forcing you to restart the submission process from scratch with a new photo. As we detail in our complete guide covering why passport photos get rejected and how to fix it, understanding exactly how scanners read your image is the key to passing the technical checks on your first try.
What are the two main types of prohibited shadows?
The two main types of prohibited shadows in biometric document photography are background drop-shadows, which appear on the wall behind the subject, and uneven facial shadows, which cast dark patches directly across the skin. Both are universal rejection causes under international guidelines because they disrupt the plain background or obscure the visible shape of facial features.
In practice, fixing lighting errors requires diagnosing exactly where the dark patches are falling. When analyzing why passport photos get rejected, lighting failures consistently rank at the top alongside expression errors and glasses issues. Recognizing the difference between a background shadow and a facial shadow is the first step to correcting your photography setup.
Shadows on the background (The drop-shadow effect)
A drop-shadow occurs when a strong, direct light source hits the applicant and casts a distinct, dark silhouette onto the wall directly behind them. According to universal biometric rules, the background must remain completely uniform, plain, and light — typically white or light grey, depending on the specific country's requirements. This plain background ensures that the outline of the head and shoulders is clearly visible to scanning software.
When taking a photo at home, this drop-shadow effect is almost always caused by two common mistakes: using a camera flash or standing far too close to the wall. A harsh smartphone flash creates a hard-edged, dense shadow behind the neck and shoulders. Similarly, standing flat against a wall blocks ambient light from filling the space behind you, creating a darker halo effect around the body. Even a soft shadow that creates a gradient effect from light to dark violates the requirement for a perfectly uniform background, leading to an automatic failure.
Get your document photo in 2 minutes
Upload a normal selfie and receive a compliant document photo that meets the official technical requirements for your country and document — ready to print or submit online.
Make my photoShadows across the face (Uneven lighting)
Facial shadows occur when the light source is directional and unbalanced, illuminating one area while leaving another in darkness. This typically happens in two common scenarios: side lighting or top-down lighting. If the light comes from only one side of the room, it leaves exactly half of the face dark, completely obscuring vital biometric data. If the light comes from directly above — such as from standard overhead room bulbs — it creates deep, dark pockets under the eyes, nose, and chin.
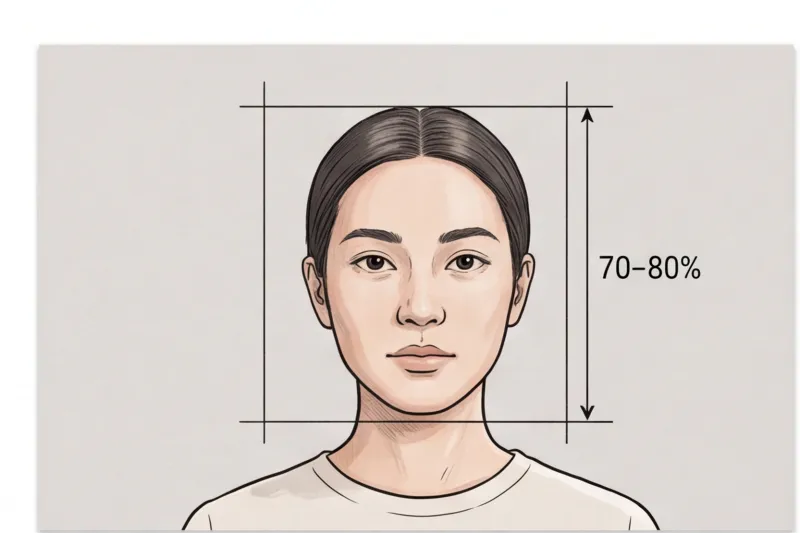
The official standard dictates that both sides of the face must be equally illuminated. Even lighting is necessary to show natural skin tones accurately and ensure correct exposure across the entire image. When a photo suffers from poor lighting, the resulting over-exposure (too bright) or under-exposure (too dark) severely ruins the focus and sharpness of the image. Because the face fills roughly 70–80% of the frame height in most standards, any dark patches dominate the final crop.
A biometric scanner reads the exact geometric distances between facial features. When deep facial shadows obscure these transition points, the software cannot accurately map the face, resulting in an immediate application rejection.
How can I prevent shadows when taking a passport photo at home?
To prevent shadows when taking a passport photo at home, position yourself facing a window for even natural light, step 1.5 to 2 feet away from a plain light wall, and turn off all camera flashes and overhead bulbs. You do not need professional studio equipment to meet international biometric standards. A controlled, do-it-yourself setup using diffuse daylight and correct physical positioning is highly effective. Once you capture a correctly illuminated, shadow-free image, you can have our professional service, PhotoID24, format it so the head size and final crop match your specific country's exact dimensions in seconds.
Step away from the wall to eliminate background shadows
A typical mistake when shooting at home is leaning directly against the wall or door used as the backdrop. When your body touches the background surface, any light source — even a relatively soft one — will cast a sharp, dark silhouette immediately behind your head and shoulders. This drop-shadow effect violates the universal rule that the background must be plain, uniform, and light (usually white or light grey) so the strict outline of your head remains completely distinct.
To fix this, step forward so there is roughly 1.5 to 2 feet (about 45 to 60 centimetres) of physical space between your back and the wall. Creating this distance allows the ambient room light to fall directly onto the wall behind you. In practice, this physical separation completely eliminates the sharp edges of any drop-shadow, ensuring the background registers as a solid, uniform block of colour that biometric scanners can isolate without error.
Face a window for even, natural lighting
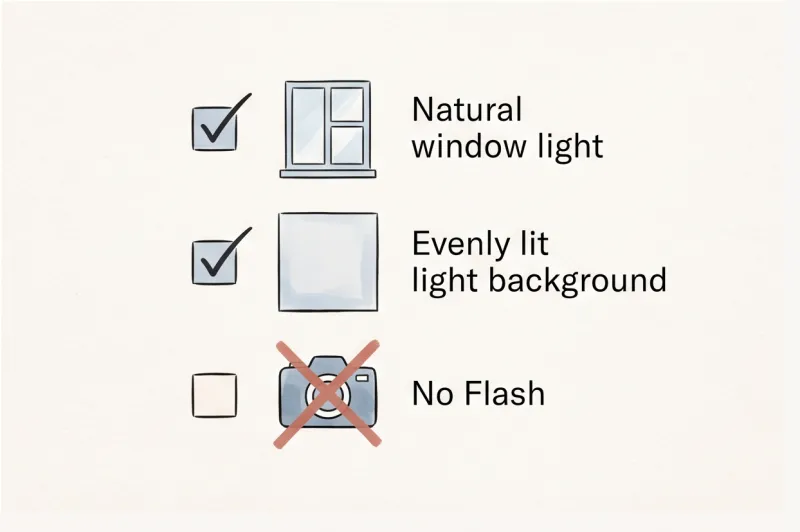
Natural daylight is the single most reliable tool for achieving the even lighting required by major passport authorities, such as the U.S. Department of State or the UK's HM Passport Office. Stand directly facing a window so the natural ambient light washes evenly over both sides of your face simultaneously. This balanced, frontal illumination prevents false geometric edges and ensures your natural skin tones are correctly exposed.
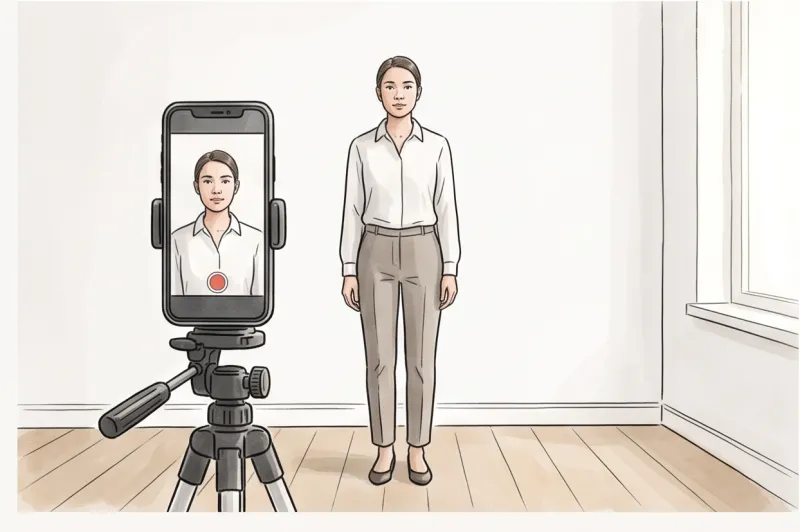
Never stand with the window positioned to your extreme left or right side. Side lighting creates severe half-face shadows, leaving one cheek fully illuminated and the other hidden in darkness, which leads to immediate rejection for uneven exposure. Similarly, standing with your back to the window causes silhouetting, severely underexposing your facial features and washing out the background. For the best results, take your photo during mid-day when natural light is bright but indirect, avoiding any harsh, direct sunbeams hitting your face.
Turn off overhead lights and camera flash
Mixing different light sources is a fast track to uneven exposure and harsh shadows. Before taking the shot, switch off all overhead ceiling lights in the room. Light bulbs positioned directly above your head inevitably cast deep, dark shadows under your eyebrows, nose, and bottom lip — a problem often referred to as "raccoon eyes." Facial recognition software struggles to map your features accurately when these artificial dark patches exist.
Furthermore, check your camera or smartphone settings to ensure the flash is forced completely off. Built-in smartphone flashes are highly directional and intensely concentrated. They almost always create harsh glare spots on the skin (particularly on the forehead and cheeks) and project a sharp, unavoidable shadow directly onto the background behind the subject. By relying entirely on the diffuse, natural light coming from the window, you allow both your face and the background to be illuminated naturally and uniformly.
Common mistakes: Can I edit out a shadow from my passport picture?
No, you cannot edit out a shadow from your passport picture. Any form of digital manipulation, filtering, or heavy retouching to correct lighting mistakes is strictly forbidden by major issuing authorities, including the U.S. Department of State and the UK’s GOV.UK.
Many applicants assume that because a plain, uniform background is required, using a background-whitening or brightening tool is an acceptable fix. In practice, trying to salvage a poorly lit image using software almost always leads to a failed application. When you attempt to 'paint' over a facial shadow, clone-stamp a dark area on the wall, or artificially brighten the background to remove a drop-shadow, the software alters the original image data. This process inevitably leaves behind digital artifacts — unnatural pixel clusters, blurred outlines around your hair, or microscopic colour shifts that are invisible to the naked eye but glaringly obvious to official document scanners.
Because biometric document photos are used to verify your identity against facial recognition databases, the image must remain an entirely unedited representation of your current appearance. If authorities detect digital alteration of any kind, the photo is automatically rejected. Furthermore, submitting a heavily retouched image can trigger fraud concerns, as the processing office cannot verify whether you only removed a shadow or if you also altered your underlying facial geometry.
Instead of relying on editing tools or beautification apps to fix a shadow, you must retake the photo using even, natural lighting. A biometric photo must accurately reflect reality, not a digitally corrected version of it.
Ready to prepare your document photo?
Skip the studio. Upload a selfie and get a professionally prepared photo that meets the official technical requirements in about two minutes.
Get startedWhat if my hair, glasses, or clothing cast a shadow?
If your hair, glasses, or headwear casts a shadow across your face or eyes, the biometric photo will be rejected. Authorities require completely clear, unobstructed facial features from the bottom of the chin to the top of the forehead, free of any dark patches caused by personal items or accessories.
Voluminous hair: Your hair must not cast shadows over your face or obscure your eye line. In practice, heavy fringes, bangs, or voluminous hairstyles can easily create dark, unreadable areas on the cheeks or forehead depending on how the light hits you. If your hair falls forward and creates these dark patches, tie it back or tuck it securely behind your ears to keep the entire facial outline clean and well-lit.
Glasses: Spectacles are a leading cause of localized shadows and lens glare. Because thick frames often cast sharp shadow lines directly across the eye sockets, they interfere with biometric eye mapping. For this reason, glasses are increasingly banned outright; authorities like the U.S. Department of State and most EU and UK passport offices no longer permit them. Our default guidance — as explored further in our guide on Glasses in Passport Photo: What Are the Rules?—is to remove them entirely unless you have a documented medical exemption that the issuing country explicitly permits.
Head coverings: Standard hats and clothing items like scarves are strictly forbidden, though exceptions exist for religious or medical purposes. If you wear an approved head covering, it must be adjusted so the full face is visible. Crucially, the fabric must sit far enough back that it does not cast a hood-like shadow over your eyebrows, temples, or cheeks. Because exception rules vary by country, always verify the official requirements of the specific issuing authority before taking your photo.
Your quick checklist for a perfectly lit, shadow-free biometric photo
A perfectly lit, shadow-free biometric photo requires facing natural light directly, maintaining distance from your backdrop, and removing items that cast shadows. Before you capture your image, run through this final checklist to ensure it meets the strict technical requirements of international authorities.
- Face a natural light source directly: Position yourself straight toward a window so that both sides of your face are illuminated evenly, eliminating unbalanced directional shadows.
- Step away from the plain, light background: Keep at least 1.5 to 2 feet between you and the white or light grey wall to prevent your body from casting a dark drop-shadow silhouette.
- Turn off the flash and overhead lights: Rely solely on ambient daylight to avoid harsh downward shadows under the nose and stark smartphone flash glare on the forehead.
- Ensure both eyes are clearly visible and shoulders are square: Keep your head level and centered, looking straight into the camera lens with no tilt.
- Remove glasses and keep hair off the face: Authorities increasingly ban glasses entirely, so take them off to avoid frame shadows over the eyes. Tuck voluminous hair back so it does not obscure your facial outline.
Get your document photo in 2 minutes
Upload a normal selfie and receive a compliant document photo that meets the official technical requirements for your country and document — ready to print or submit online.
Make my photoGet a compliant, professionally checked document photo in minutes
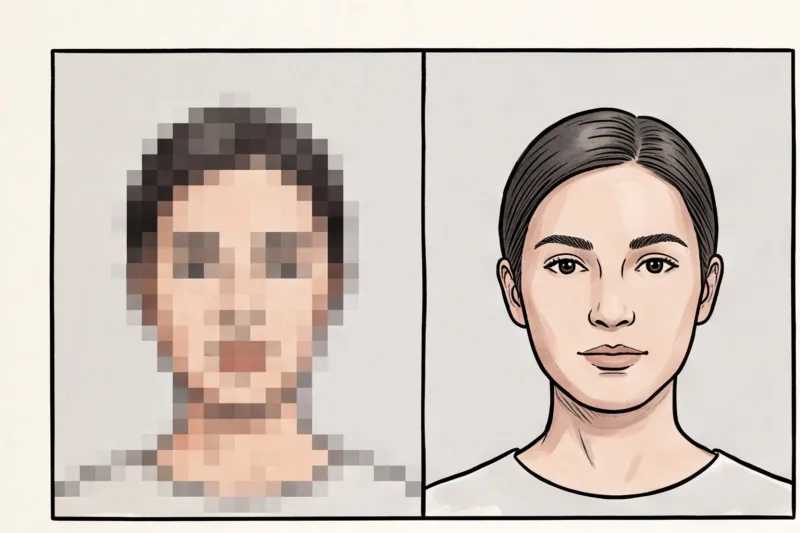
Taking a picture without passport photo shadows is only half the battle; ensuring that the final file meets exact national dimensions and technical specifications is just as critical. Even a perfectly illuminated, shadow-free image will be rejected if the head-height ratio is incorrect, the crop is poorly aligned, or the resolution is too low. Requirements vary significantly around the world. For example, you might need the widespread 35 × 45 mm format used across most of the EU, the UK, and Australia, or the strict 2 × 2 inch (51 × 51 mm) square required by the United States Department of State. Manually adjusting an image to hit these precise metrics is a common source of error.
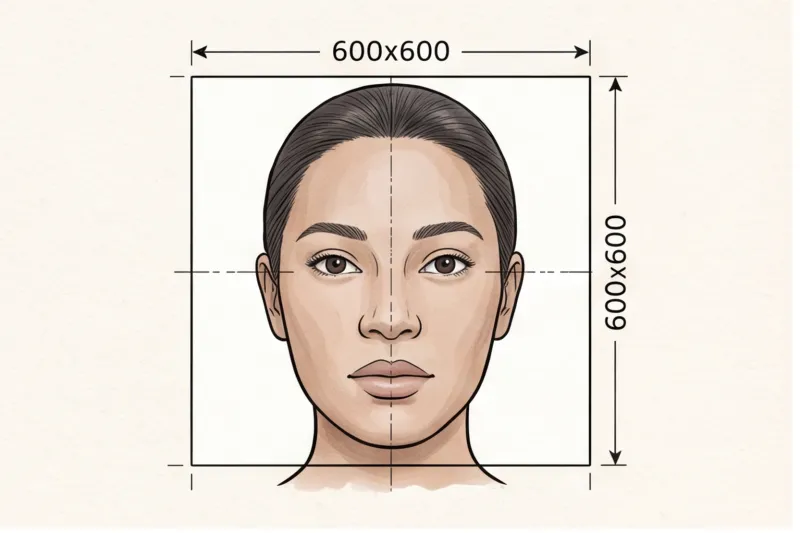
In practice, incorrect dimensions and low technical quality rank right alongside poor lighting as top reasons for application delays. When cropping photos at home, applicants frequently alter the aspect ratio, leave too little space above the head, or inadvertently save the file with heavy JPEG compression. For online applications, you must also navigate specific pixel requirements—such as the US mandate of at least 600 × 600 px—alongside strict maximum file sizes. A single miscalculation means your application is paused until you can provide a new, compliant image.
Instead of guessing and risking a rejection, use PhotoID24. Once you have captured a well-lit selfie using natural window light, simply upload it to our platform. You select the specific country and document you are applying for, and the service automatically checks and formats your image against the official requirements. The system handles the precise centering, ensures the background meets the plain, light uniform standard, and applies the exact head-to-frame ratio demanded by that nation's issuing authority.
The result is a professional photo ready for immediate use. If you are applying through a government web portal, you will receive a digital file perfectly optimized for online submission. If your country still requires physical copies, the service provides a ready-to-print template containing multiple identical photos. You can easily print this sheet at home on high-quality photo paper, or opt for physical delivery where the service is offered, ensuring you avoid the technical pitfalls of standard plain-paper printing.
You do not need specialized photography equipment, expensive studio appointments, or manual photo-editing software that might inadvertently alter your facial features and trigger a fraud concern. Your clear action for today is straightforward: stand facing a natural light source to eliminate facial shadows, step away from the wall to drop background silhouettes, and snap your picture. Then, upload that photo to PhotoID24. Let our service deliver a professionally formatted, compliant document photo in minutes, saving you time and protecting your application from unnecessary delays.