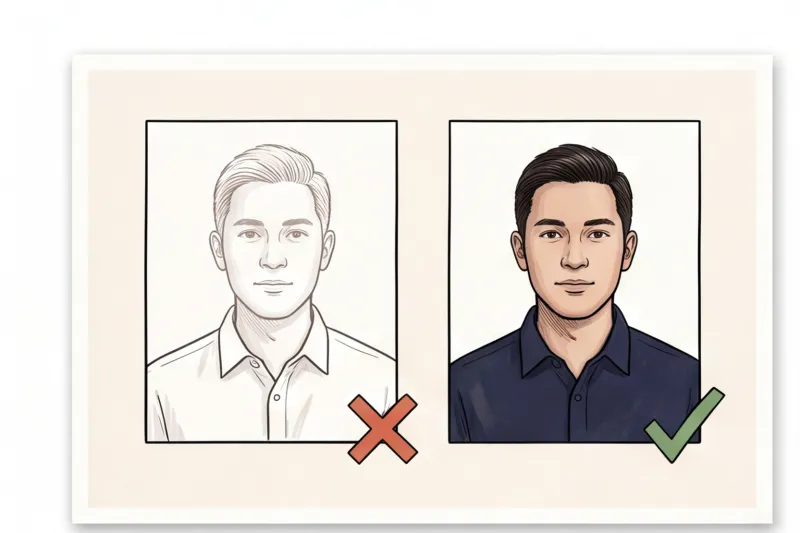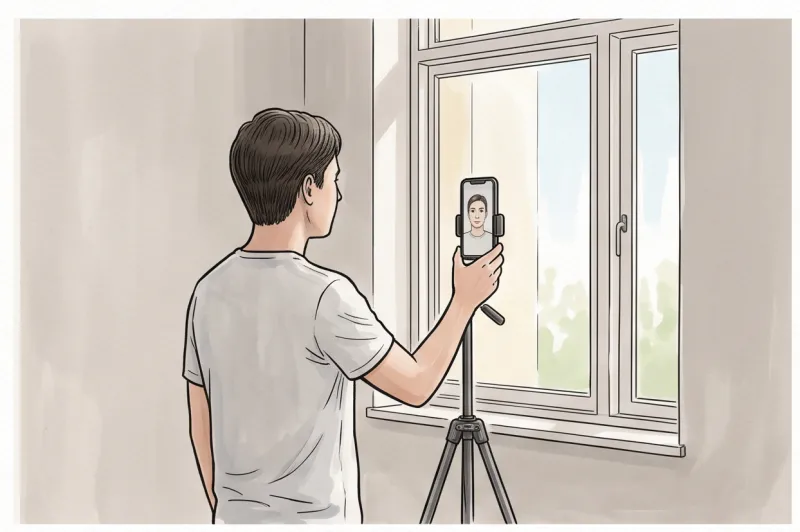
Can you take a passport photo at home?
Wondering how to take a passport photo at home that actually gets approved? Yes, taking your own document photo is entirely legal and increasingly common. Official authorities, including the U.S. Department of State and the UK’s GOV.UK, fully accept images captured on a personal device, provided they adhere to strict biometric guidelines.
Free tool: After your shot, crop and resize your passport photo online for free to the exact size for your country — right in your browser.
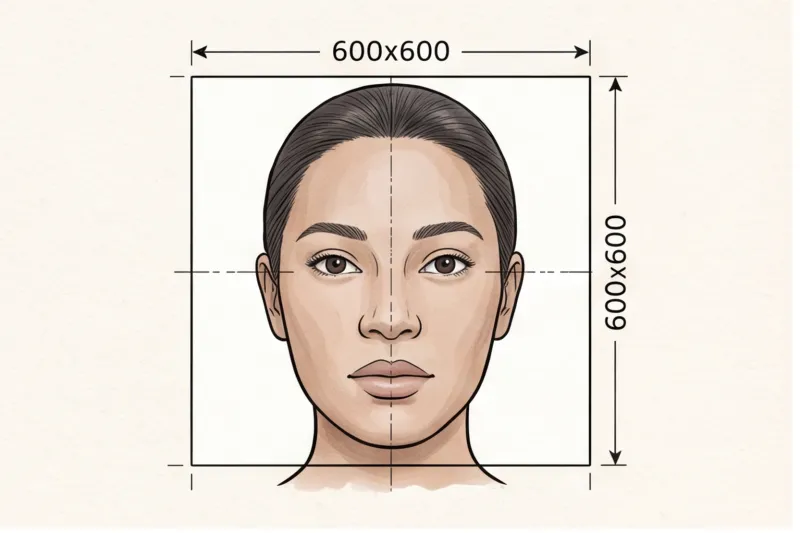
The international machine-readable travel document standard (ICAO Doc 9303) focuses exclusively on the technical properties of the image—such as even lighting, a neutral expression, and a plain light background—not the location where the photo was shot. You do not need a professional photo studio to meet these criteria. In fact, the rear lens on a standard modern smartphone easily exceeds typical resolution requirements. Whether an authority asks for a high-quality print at 300 to 600 DPI, or a digital file with specific dimensions like the US 600 × 600 pixel minimum, your phone's camera is more than capable of capturing the necessary detail.
However, there is one major caveat: government systems are completely unforgiving when evaluating the rules. A high-resolution smartphone cannot compensate for a shadow cast across your face, an open mouth, or a slightly textured wall. In practice, the most frequent reasons home photos face rejection are uneven lighting, non-uniform backgrounds, and incorrect posture. Taking your passport picture at home is a highly convenient option, but it requires strict attention to detail before you press the shutter.
What equipment do you need for a DIY passport photo?
To take a passport photo at home, you only need four items: a modern smartphone, someone to hold the device (or a tripod), a plain, light-coloured background, and a large window for even, natural light. You do not need a professional DSLR camera or studio lighting equipment.
A standard modern smartphone is perfectly capable of doing the job, as its camera quality easily exceeds standard resolution requirements. However, you must use the rear camera rather than the front-facing lens. The rear camera offers a better focal length, which prevents the facial distortion that is common in close-up shots.
Never submit a handheld selfie. In practice, we see countless photos rejected because the applicant held the phone themselves. Stretching your arm out naturally drops one shoulder, creates a twisted posture, and usually results in an off-centre, tilted head. Instead, always use a tripod or ask a friend or family member to hold the camera at eye level, roughly 1.5 to 2 metres away from you.
For your background, locate a plain, light, and uniform wall. White or light grey is the standard required by most international authorities. Ensure the wall has no heavy textures, patterns, shadows, or objects visible in the frame.
Lighting is often where home setups fail. Stand directly facing a large window to allow soft, natural light to illuminate your face evenly. Do not use your smartphone's flash. A direct flash creates harsh shadows on the wall behind your head, causes glare on your skin, and risks red-eye — all of which violate biometric guidelines and lead to automatic rejection.
Get your document photo in 2 minutes
Upload a normal selfie and receive a compliant document photo that meets the official technical requirements for your country and document — ready to print or submit online.
Make my photoHow to set up perfect lighting and a compliant background
To set up perfect lighting and a compliant background for a passport photo at home, stand directly facing a large window to ensure even, natural light falls across your face, and position yourself about half a metre away from a plain, light-coloured wall. This eliminates the harsh shadows and uneven lighting that cause most official document rejections.
In practice, poor lighting is the number one reason home passport photos get rejected. Biometric standards require your facial features to be fully visible, with correct exposure and natural skin tones. If you stand with a window to your side rather than in front of you, you create side-lighting. This leaves half of your face in deep shadow and the other half brightly illuminated — a false contrast that will immediately fail official checks. Always face your light source squarely, and avoid direct, glaring sunlight that might make you squint or alter your neutral expression.
Shadows on the background are just as problematic. A typical mistake when taking a DIY photo is leaning flat against the wall, which casts a hard, dark outline around your head and shoulders. The exact fix is simple: step half a metre away from the wall. This distance allows any shadow to fall downwards and completely out of the camera’s frame, keeping the area behind your head clear.
Official guidelines dictate that the background must be plain, uniform, and light-coloured — usually white or light grey, depending on the country. It must be completely untextured and free of any objects, patterns, or other people. Even a visible door frame, a light switch, or patterned wallpaper in the frame will result in an automatic rejection.
Finding a completely flawless, untextured wall in a typical home can be difficult. Fortunately, you do not need to rebuild your room just for this application. As long as you take the photo in good, even light, our professional service, PhotoID24, resolves background compliance automatically. When you upload your photo, our system clears the original background and seamlessly applies the correct plain, uniform backdrop required by your specific country and document, ensuring the final image meets the official technical requirements in minutes.
How to pose for a passport photo: Expression and clothing rules
To pose for a passport photo, face the camera straight on, keep your head centred, and look directly into the lens. You must maintain a strict neutral expression with your mouth closed and both eyes clearly visible. Wear everyday clothing that contrasts with the background, and remove all glasses and headwear.
When setting up the shot, ensure you are looking at the actual camera lens, not the screen of your smartphone. Looking at the screen causes your eyes to angle downward, which alters your biometric profile. Your shoulders should be square, with your eyes and head perfectly level. In practice, the most frequent reason a photo is rejected by authorities is a non-neutral expression. Frowning, raised eyebrows, or even a slight, closed-mouth smile shifts your facial landmarks. Keep your face completely relaxed, with your mouth closed and both eyes fully open.
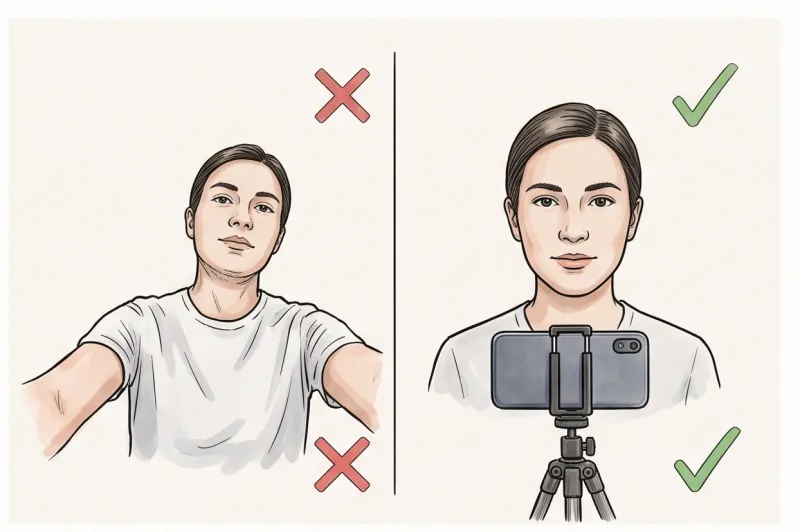
Your wardrobe choices also impact the final result. Do not wear uniforms, clothing that looks like a uniform, or camouflage attire, as these are strictly prohibited by most national guidelines. Instead, opt for everyday, casual or business-casual clothes. Because the background must be plain white or light grey, wearing a dark or vividly coloured top is highly recommended. It provides necessary contrast, clearly defining the outline of your shoulders against the background so the system can read your posture correctly.
Hats, large hair accessories, and headphones are universally banned. Head coverings are allowed only for documented religious or medical reasons. If you wear a covering under these exceptions, it must be worn in a way that does not cast any shadows on your face. Your full face must be clearly visible from the bottom of your chin to the top of your forehead. Always verify your specific country's exception rules, as authorities often require a signed doctor's note or a sworn religious statement submitted alongside the photo.
When it comes to eyewear, the default guidance is simple: take your glasses off. There is an increasing global trend to ban glasses entirely in document photos to speed up facial recognition and biometric processing. Authorities such as the U.S. Department of State and the UK's GOV.UK have completely banned glasses for passport applications. Even in countries where they are still technically permitted, any lens reflection, tinted lenses, or thick frames covering any part of the eye will trigger an immediate rejection. Unless you have a severe, documented medical exception that your specific destination country permits, remove your glasses for the photo.
Ready to prepare your document photo?
Skip the studio. Upload a selfie and get a professionally prepared photo that meets the official technical requirements in about two minutes.
Get startedHow to take a passport photo with a smartphone: Step-by-step
To take a passport photo with a smartphone, position the camera exactly at eye level, stand square to the lens, and have the photographer step back 1.5 to 2 meters (4 to 6 feet) to prevent facial distortion. Shoot the image slightly wide, leaving plenty of space around the head and shoulders, and take multiple frames to guarantee a perfectly neutral expression.
Positioning the camera correctly is critical for biometric compliance. The lens must be perfectly aligned with your eyes; high angles make the forehead look disproportionately large, while low angles distort the chin and jawline. Stand square to the camera with your shoulders down, level, and relaxed. Keeping your posture natural prevents the tilted, uneven shoulders that often cause home-taken photos to fail technical checks.
Distance is where most DIY attempts go wrong. Modern smartphone rear cameras use wide-angle lenses. If the phone is held less than a meter from your face, it stretches the center of the image, distorting your actual proportions so that the nose appears larger and the ears smaller. To avoid this, your photographer must stand roughly 1.5 to 2 meters away. Always use the standard rear camera, as it provides a flatter, more accurate focal length than the front-facing selfie lens.
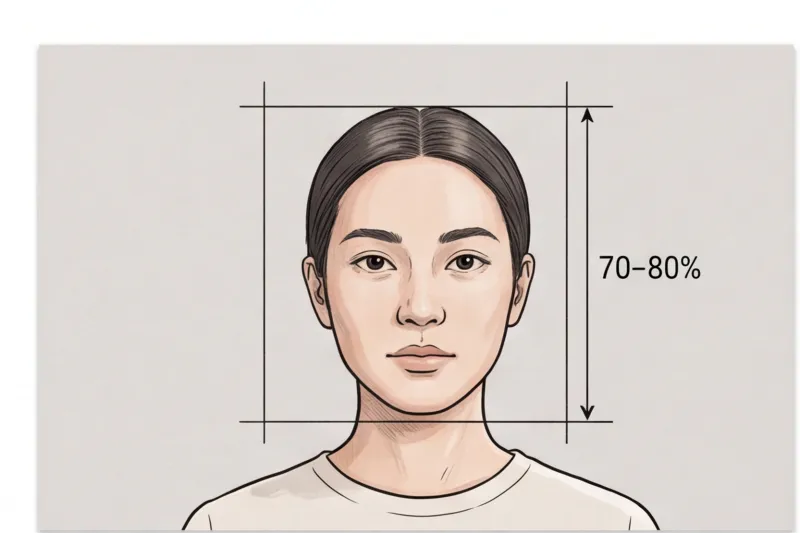
When framing the shot, do not attempt to crop the image tightly in the viewfinder. A frequent practical mistake is zooming in too much, which leaves insufficient background space to format the photo later. Instead, step back and shoot wide. Capture everything from the mid-chest upward, ensuring there is a generous amount of blank space above your hair and beside your arms. The exact head-height ratio—which requires the face to fill roughly 70–80% of the frame in most ICAO-aligned standards—will be accurately achieved during the final cropping and processing stage.
Finally, take multiple photos in a continuous sequence. Maintaining a strict neutral expression without looking tense is challenging, and subtle blinks happen in milliseconds. Shooting several frames gives you a safe margin to review the batch and select one where both eyes are fully open, the gaze is locked on the lens, and the mouth is entirely closed.
How to take a passport photo for a baby or newborn at home
To take a passport photo for a baby or newborn at home, either lay the infant on their back on a plain white sheet and shoot from above, or drape a car seat with a white cloth and strap them in. The photo must feature only the child — absolutely no toys, pacifiers, or parental hands can be visible in the frame.
In practice, photographing an infant at home is much easier than attempting it at a commercial studio. You control the environment and the schedule, allowing you to capture the photo when the baby is well-rested and calm, rather than fighting against the clock during a stressful appointment.
To get a compliant shot without needing to physically hold the baby, rely on one of these two proven setups:
- Method 1: The floor setup. Lay a plain white or light grey sheet on the floor near a large window to capture even, natural light. Place the baby on their back and shoot directly from above. Be careful not to lean over too far and cast a shadow over the child's face or the background.
- Method 2: The car seat. Cover a baby car seat with a plain white sheet, ensuring the fabric is smooth and untextured, and strap the child in safely. This keeps the baby secure and upright, allowing you to step back and take the photo at eye level.
Get your document photo in 2 minutes
Upload a normal selfie and receive a compliant document photo that meets the official technical requirements for your country and document — ready to print or submit online.
Make my photoWhile basic biometric principles apply, authorities generally understand that newborns cannot follow posing instructions. Most countries relax the "eyes fully open" and "neutral expression" rules for infants. A slightly open mouth or partially closed eyes will often pass, though you should always check your specific country's official guidelines to confirm their exact tolerance for infant expressions.
However, the requirement for a clear, unobstructed face remains rigid. A universal ICAO requirement is that no other people or hands may appear in the frame. A frequent cause for passport photo rejection is a parent's hand visible supporting the baby's head. If head support is necessary, place rolled-up towels underneath the white sheet so they remain entirely out of view. Finally, remove all pacifiers, dummies, and toys, ensuring the baby's full face outline is clearly visible.
Why home passport photos get rejected (and how to fix them)
Home passport photos are most commonly rejected because of digital manipulation, incorrect cropping, low technical quality, or simply being out of date. To fix these issues, you must turn off automatic camera filters, use high-resolution settings, and format the image to the exact dimensions specified by the destination country.
In practice, one of the most frequent reasons a DIY photo fails is accidental digital manipulation. Many modern smartphone cameras apply automatic "digital beautification" or skin-smoothing filters by default. These must be completely disabled before you shoot. While removing a temporary spot or blemish is usually acceptable, filters that alter your face shape, skin texture, or eye size are strictly forbidden by biometric standards. The photo must look exactly like you.
Another major pitfall is attempting to guess the dimensions or crop the image manually. There is no single global passport photo size. For example, most of Europe, the UK, and Australia require a 35 × 45 mm photo, whereas the United States Department of State mandates a 2 × 2 inch (51 × 51 mm) format. Furthermore, every country dictates a specific head-height ratio.
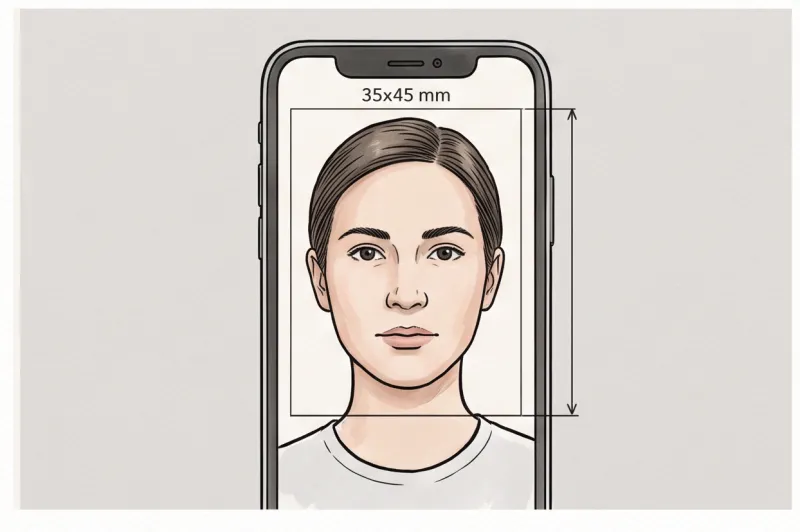
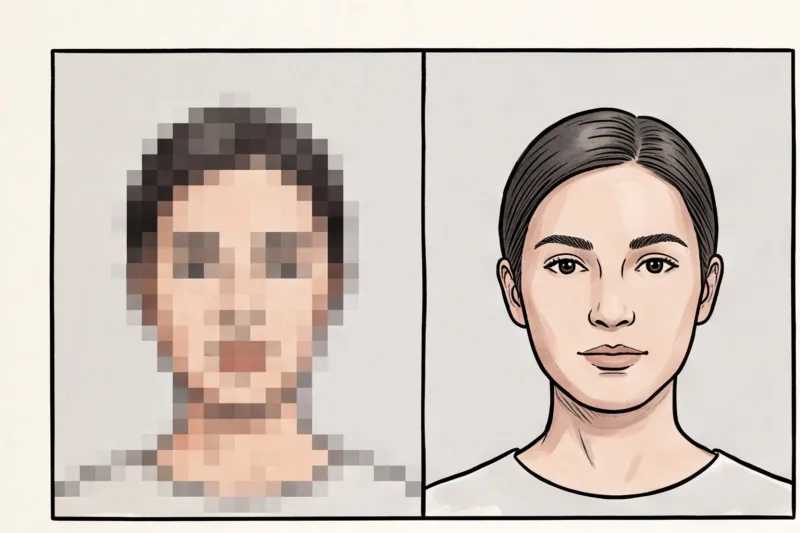
Authorities also reject photos for low technical quality. The image must be perfectly sharp and in focus. Blurry photos, heavy JPEG compression artefacts, or low-resolution pixelation will not pass the official checks. Always ensure your smartphone lens is clean, and tap the screen to lock focus on the subject's eyes before taking the picture.
Finally, the image must be recent enough. Universally, passport and visa photos must be taken within the last 6 months (though some countries specify 3 months) to accurately reflect your current appearance. Submitting an old photo risks delaying your application.
- Turn off filters: Disable all portrait modes and beauty enhancements.
- Check official sizes: Never guess the crop; verify if you need 35 × 45 mm, 2 × 2 inches, or another specific format.
- Inspect at 100% zoom: Ensure there is no blur or heavy compression.
- Take it fresh: Always shoot a new photo to meet the 6-month rule.
How to format your photo without guessing the rules
To format your document photo accurately without guessing the rules, skip manual editing and upload your raw picture directly to a professional service. In practice, cropping a passport photo to the exact millimeter or pixel size is consistently the hardest part of the DIY process.
Every government enforces strict, unique dimensions for their documents. For example, the United States Department of State requires a 2 × 2 inch (51 × 51 mm) format, while most European authorities mandate a 35 × 45 mm size. Beyond the outer dimensions, your face must fill a precise portion of the image — commonly roughly 70–80% of the frame height, depending on the specific country's standard. Attempting to manually measure this exact head-height ratio or center the shoulders precisely on a smartphone screen frequently leads to incorrectly framed images, which is a leading cause of application delays.
Instead of struggling with manual editing, you can upload your raw home photo to our service, PhotoID24. Our system checks the photo against the official requirements for your specific country and document. It accurately adjusts the background to the required plain, uniform colour and crops the image to the exact required size in roughly two minutes.
Whether you are applying for a US passport photo or a UK driving licence picture, selecting your document from our catalog ensures the exact official specifications are applied instantly. You receive professional results ready for print or digital submission. This ensures your final image fully meets the official technical requirements, saving you significant time and preventing a frustrating rejection.
Ready to prepare your document photo?
Skip the studio. Upload a selfie and get a professionally prepared photo that meets the official technical requirements in about two minutes.
Get startedPrinting vs. digital submission for home photos
Whether you need a printed or digital passport photo depends entirely on the country and your chosen application method. Online applications require a digital file with strict pixel dimensions and file-size caps, while traditional paper forms demand high-quality physical prints on dedicated photo paper.
When submitting digitally, you cannot simply upload a raw image from your camera roll. The file must meet precise technical limits. For instance, the U.S. Department of State mandates a minimum of 600 × 600 pixels for digital uploads, whereas digital photo rules for the UK or Schengen visas have completely different dimensions and data caps. Always verify the exact requirement on the official authority's website or by checking our specific document guide to ensure your file will be accepted by the online portal.
If your application requires physical photos, printing at home is possible, but you must use proper photo paper, never standard office printer paper. In practice, authorities frequently reject physical photos because the print quality is too low, the colours have shifted, or the applicant chose the wrong paper finish. You must check whether the specific country requires a matte or glossy surface. Furthermore, the submitted photos usually must be identical and printed without white borders, unless the authority's guidelines explicitly state otherwise.
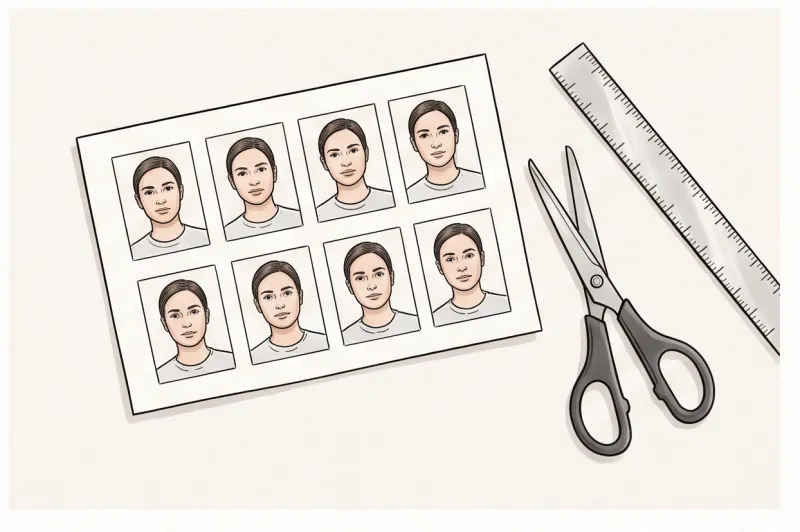
Formatting a file for both scenarios does not have to be difficult. When you use PhotoID24, we process your image to meet the official technical requirements of your destination country. We provide both the correctly sized digital file for immediate online upload and a perfectly aligned, ready-to-print sheet for physical applications, ensuring you have exactly what you need.
Your home passport photo checklist
Before you finalize your application, verify your raw photo against five critical biometric standards. A compliant passport photo taken at home requires a plain, uniform background, even lighting without shadows, a neutral expression, the removal of glasses or unapproved headwear, and precise processing to meet exact government specifications.
In practice, applicants often rush the final review, leading to easily preventable delays. Even if you follow the general rules, missing a single technical detail can cause a returned application. To ensure your picture meets the official technical requirements, use this definitive pre-submission checklist:
- Is the background plain, light, and uniform? Inspect the space immediately behind your head. There must be no visible textures, door frames, light switches, patterned wallpaper, or other people. The background should be a solid, light colour (typically white or light grey, depending on your specific country's exact guidelines, which derive from ICAO Doc 9303 standards).
- Is there even lighting with no shadows on the face or background? Review the image closely for any harsh contrasts. Shadows under the nose or chin are frequent causes for rejection because they alter the perceived shape of facial features. Furthermore, you should not see a heavy drop shadow cast on the wall behind you, nor should one side of your face be darker than the other.
- Do you have a neutral expression, with your mouth closed, looking directly at the lens? Facial recognition software requires a perfectly relaxed face to map biometric points accurately. Ensure you are not smiling, frowning, or raising your eyebrows. Both eyes must be open, clearly visible, and looking straight into the camera lens — not down at the smartphone screen.
- Are you free of glasses and headwear? Unless you have a documented medical or religious exemption, remove all headwear. You should also take off your spectacles. Authorities like the U.S. Department of State and most European Union governments have banned glasses entirely to prevent lens glare and frames from obscuring the eyes. If you wear an approved religious head covering, ensure your full face remains visible from the bottom of the chin to the top of the forehead, with no shadows cast on your skin.
- Has the photo been uploaded to a professional service to ensure exact compliance and cropping? Do not attempt to manually crop your image to 35 × 45 mm, 2 × 2 inches, or specific pixel dimensions. Every government authority enforces strict head-to-image proportions. If your face fills 60% of the frame but the official standard demands 70–80%, the photo will be rejected.
The single most reliable action you can take today to secure your document is to stop struggling with manual edits, free resizers, or guesswork. Any digital manipulation, such as applying filters or altering your facial features, is strictly prohibited and will invalidate the image.
Instead, simply take your well-lit, raw photo and upload it to our service, PhotoID24. We handle the complex formatting automatically. The system adjusts the background and crops the image to the exact measurements required by your destination country's official authority in minutes.
Get your document photo in 2 minutes
Upload a normal selfie and receive a compliant document photo that meets the official technical requirements for your country and document — ready to print or submit online.
Make my photoBy running through this visual checklist and utilizing a professional formatting tool, you eliminate the technical risks from the DIY process. You save time, avoid the frustration of an official rejection, and receive a final image that is fully prepared for your application.
Guide Chapters
How to Take a Passport Photo with iPhone
Wondering if you can use your smartphone for official documents? Find out how to correctly capture a fully compliant passport photo using your iPhone.
Best Passport Photo App Options: Tested & Compared
Avoid document rejection with the right tool. We tested and compared top options to help you find the best passport photo app for your exact needs.