What Does the Passport Photo Head Size Rule Actually Mean?
A staggering number of passport applications stall for a reason most people never even think to check. When preparing documents, applicants focus almost entirely on the outer dimensions — carefully cutting a 35 × 45 mm rectangle or setting up a 2 × 2 inch square — while ignoring the internal geometry. However, an official photo actually has two strict size requirements: the overall outer dimensions and the specific passport photo head size inside that frame.
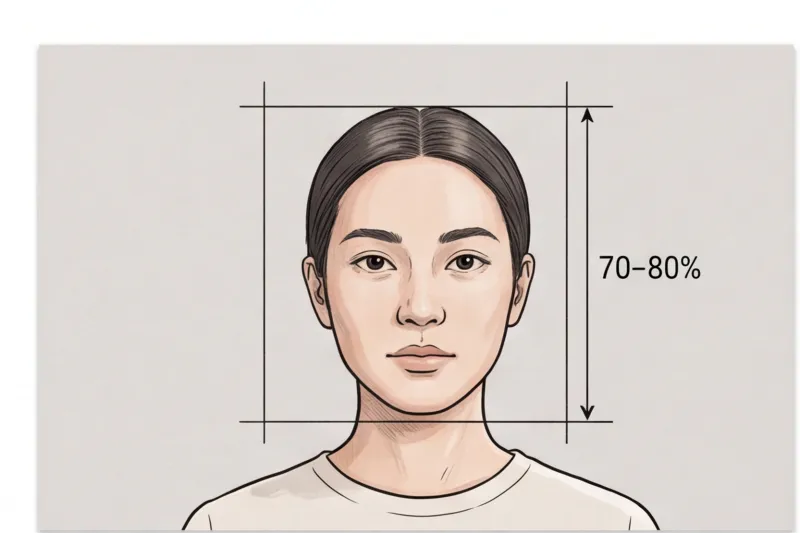
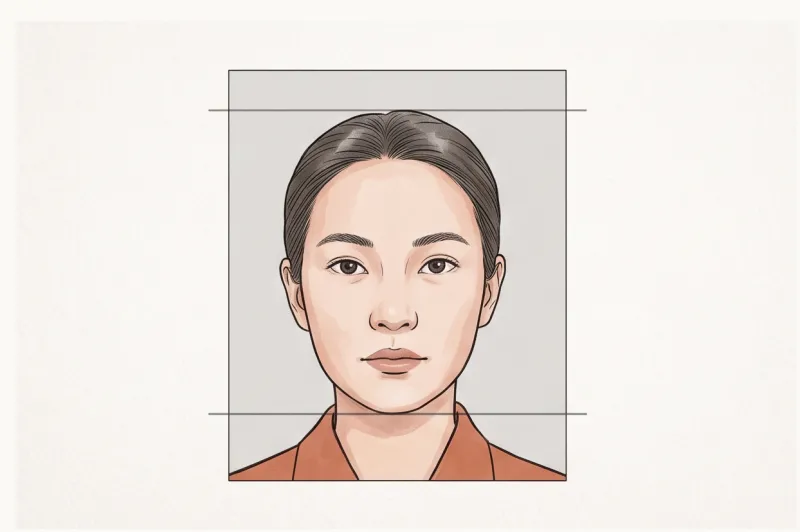
In official terms, the head size rule dictates the precise ratio your face must occupy within the image. It is a strict measurement taken from the lowest point of your chin to the top of your head, known as the crown (the actual top of your skull, not the top of your hair). If this ratio is incorrect, the photo is automatically flagged as invalid.
This internal proportion is not an arbitrary aesthetic choice. It stems directly from ICAO Doc 9303, the international standard governing machine-readable travel documents. Most national passport authorities base their rules on this document, which specifies that the face must fill roughly 70 to 80% of the frame's total height. While the exact millimeter or pixel measurements differ depending on your country's required outer photo size, this biometric baseline remains highly consistent worldwide.
Why do authorities enforce this specific crop so strictly? Modern border control relies on automated biometric scanners. These software systems need consistent facial mapping to measure the exact distances between key features — specifically the spacing between your pupils, the bottom of your nose, and the edge of your chin. If your head is framed too small, the software cannot extract enough resolution to accurately measure these points. If your face is too large and pushes out to the very edges of the photo, the scanner loses the necessary bounding context to verify your identity.
Getting this internal geometry wrong is a guaranteed technical failure, often rejected instantly by digital submission portals. We cover the full requirements and exactly what triggers these automated checks in our complete guide to why passport photos get rejected.
Why is Your Passport Photo Head Size Getting Rejected?
Your passport photo head size will be rejected if the face appears too large, too small, off-centre, or tilted within the frame. Biometric scanners rely on exact spatial proportions to map your facial features, and any deviation in the crop prevents the system from verifying your identity.
In practice, incorrect dimensions and poor cropping are among the most frequent reasons a photo is rejected by passport authorities. When a photo fails the initial technical check, it is usually due to one of the following framing errors.
The face is too large: A common mistake when taking photos at home is zooming in too closely, creating a "floating head" effect. This leaves little to no headroom above the subject. In most biometric standards, if your hair is cut off at the top edge or your chin touches the bottom, the photo is invalid. The software requires a clear, continuous border of plain background around your entire head to isolate your silhouette.
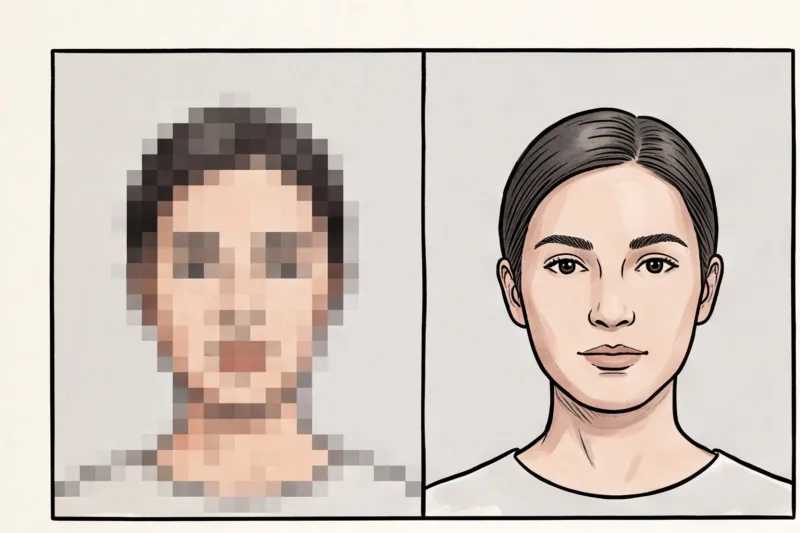
The face is too small: Conversely, if the photo is taken from too far away, it leaves too much dead space above the head. When this happens, your facial features become physically too small within the image data. Biometric systems must measure exact distances — such as the space between your pupils, the width of your nose, and the length to your chin. If the face occupies only a fraction of the frame instead of the required 70–80%, the scanner lacks the necessary resolution to map these anchor points accurately.
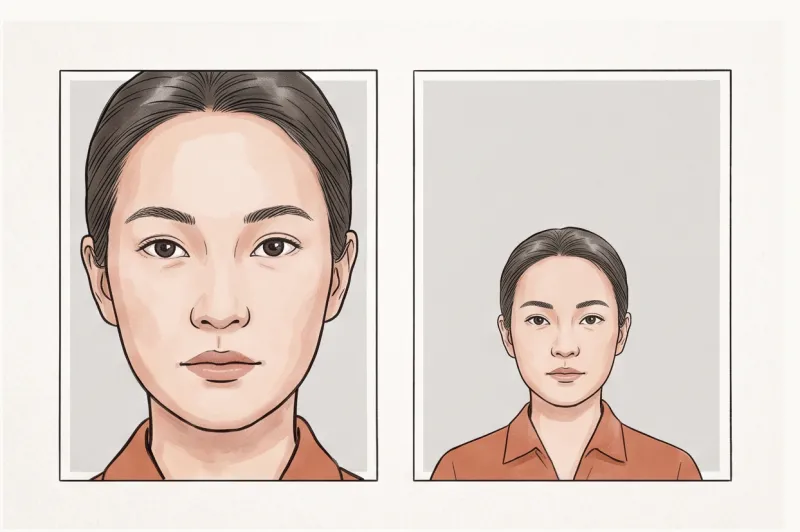
The head is tilted or off-centre: A passport photo must be geometrically aligned. Even if your overall head size is mathematically correct, a tilted head misaligns the biometric grid. Your eyes and head must be perfectly level, looking directly into the lens, with your shoulders square. If your head is leaning to one side or positioned too far to the left or right of the frame, the automated system will reject it immediately.
We cover the full spectrum of these technical errors, along with other common pitfalls like uneven lighting and non-neutral expressions, in our complete guide.
Get your document photo in 2 minutes
Upload a normal selfie and receive a compliant document photo that meets the official technical requirements for your country and document — ready to print or submit online.
Make my photoThe 'Voluminous Hair' Trap: How to Measure Correctly
Applicants with thick, tall, or voluminous hairstyles frequently encounter a unique sizing problem. It is critical to understand how authorities calculate head height: the measurement must always be taken from the bottom of the chin to the actual top of the skull (the crown), entirely ignoring the volume of the hair above it.
A common trap is measuring to the absolute highest peak of the hair. If you scale the photo so that the top of your hair hits the official maximum height line, you will drastically shrink the size of your actual face. This forces your chin far too low in the frame, leading directly to a "face too small" rejection.
While your hair must never fall across your face or obscure your eyes, the upper bounding box of the photo must accommodate your hairstyle without pushing your chin out of bounds. The correct approach is to align the chin and the anatomical crown of the head within the required ratio. If the top of the hair extends slightly beyond the standard limit, it is accommodated by the framing geometry as long as the core facial structure is sized correctly and the chin is perfectly positioned in the lower section of the image.
How Do Head Proportions Change by Country?
There is no single universal standard for passport photo head size; the required millimeter height of your head depends entirely on the specific country's outer document dimensions. Every government authority sets its own internal geometric rules detailing exactly how much of the frame your face must occupy.
Because the outer frame sizes vary dramatically across the globe, the internal head measurements must scale accordingly. For example, most European nations, the UK, and Australia rely on the widely used 35 × 45 mm format. Contrast this with the United States, which requires a larger square 2 × 2 inch (51 × 51 mm) photo for both passports and visas. Meanwhile, China mandates a distinct 33 × 48 mm format for its documents. Applying a European head-size ratio to a US passport photo will instantly trigger a rejection, as the underlying biometric grid is completely different.
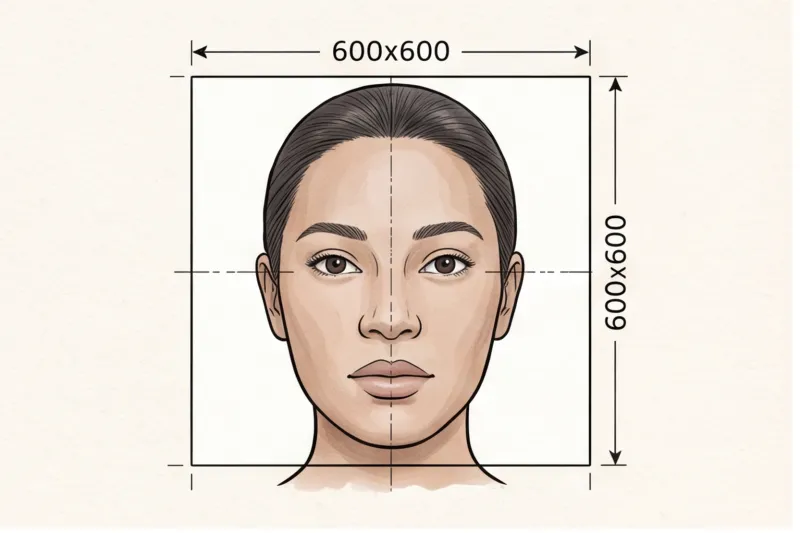
In practice, guessing these measurements is a guaranteed way to fail an application. This is especially true for modern online submissions, where digital uploads introduce strict, pixel-specific rules that dictate head proportions. A digital US passport photo, for instance, must be a minimum of 600 × 600 pixels, and the digital intake system evaluates the head geometry based on exact pixel coordinates for the chin and the top of the head.
Rather than manually calculating millimeter ratios or pixel percentages for different embassies, you should always process the image according to the official specification. You can select your destination country and document type directly via PhotoID24, which will automatically format and crop your image to meet the official technical requirements and exact head proportions for that specific government.
How Can You Ensure the Correct Head Size When Taking a Photo at Home?
To ensure the correct head size when taking a passport photo at home, you must avoid selfies, stand 1.5 to 2 meters away from the lens, and shoot a wide frame that includes your shoulders and plenty of background space. Capturing a wider original image gives you the necessary room to properly crop the face to the exact biometric proportions required by your country's official standard.
In practice, a typical mistake when shooting at home is trying to perfectly frame the final crop in the camera viewfinder. This usually results in the face being far too large in the frame, eliminating vital headroom and leading to instant rejection. To prevent this, follow a specific physical setup.
First, do not take a selfie. Modern smartphone front cameras use wide-angle lenses. When held at arm's length, this lens distorts your facial proportions, often making the nose appear wider and artificially altering the biometric distances between your eyes, nose, and chin. Furthermore, holding the device yourself makes it nearly impossible to keep your shoulders perfectly square and your head level.
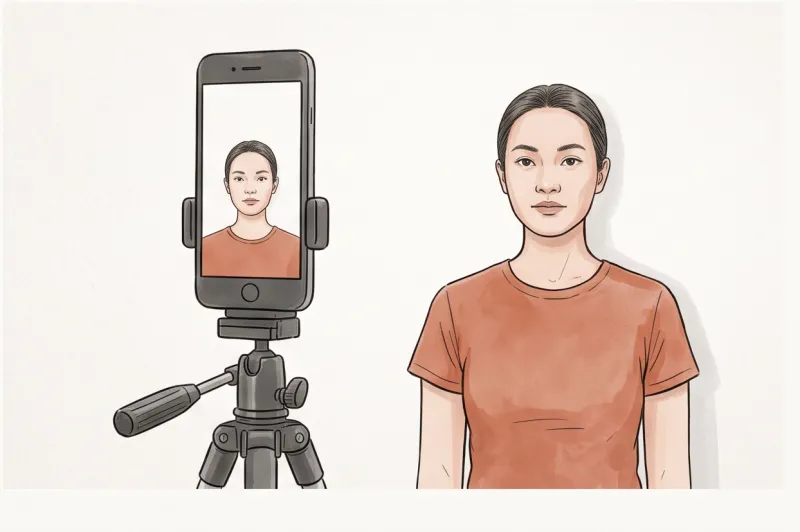
Instead, use a tripod or ask a friend for help. Position the camera about 1.5 to 2 meters away from you, perfectly at eye level. Shooting from this distance flattens the optical perspective, capturing your true facial geometry exactly as official biometric scanners expect to process it.
Next, always shoot wider than needed. Frame the shot from your mid-chest upwards. Leave a generous amount of plain, light background visible above the top of your head and on both sides of your face. It is incredibly easy to crop a loosely framed photo down to achieve the standard 70–80% head-height ratio later. Conversely, if you frame the shot too tightly and cut off the top of your hair or leave no headroom, the photo cannot be salvaged.
Follow this practical step-by-step checklist for DIY framing:
- Set the distance: Place the camera 1.5 to 2 meters away at eye level.
- Check the environment: Ensure you are standing against a plain, light, uniform background with no shadows behind your head.
- Frame loosely: Capture from the chest up, leaving substantial empty space above the crown of your head.
- Hold still: Maintain a neutral expression, face straight to the camera, with both eyes open.
Ready to prepare your document photo?
Skip the studio. Upload a selfie and get a professionally prepared photo that meets the official technical requirements in about two minutes.
Get startedShould You Manually Crop the Passport Photo Head Size?
You should generally avoid manually cropping your passport photo because it is extremely difficult to accurately measure pixels or millimeters by eye to hit the strict 70–80% head-height ratio. Instead of risking a rejection due to manual guesswork, the most reliable approach is to rely on professional software that automatically calculates the exact biometric proportions for your specific document.
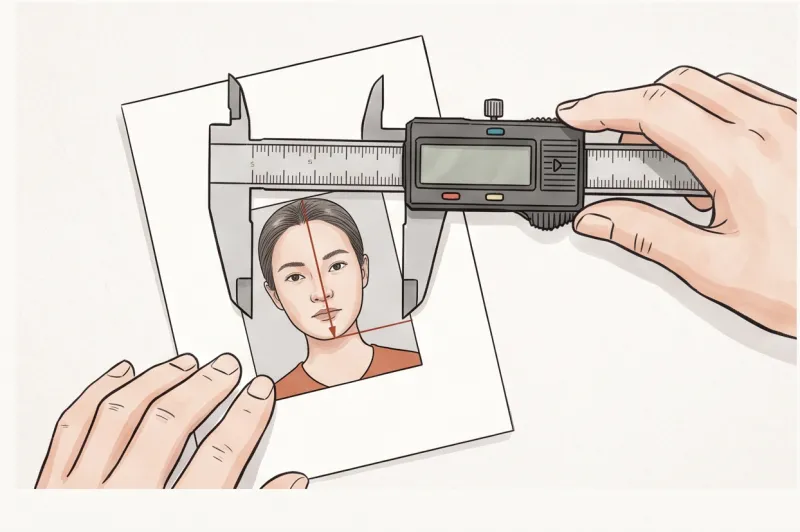
In practice, a frequent mistake applicants make when preparing a photo at home is using standard smartphone editing tools to trim the background. Biometric standards, such as those derived from ICAO Doc 9303, demand highly specific internal geometry. For example, if a country requires a 35 × 45 mm physical print where the head must measure exactly between 32 and 36 mm, guessing that ratio on a digital screen usually results in an off-centre crop or insufficient space above the head. The bottom of the chin, the top of the crown, and the horizontal eye line must all align perfectly within invisible boundaries. Trying to drag digital crop handles to satisfy both the outer dimensions and the internal head scale simultaneously is a frustrating mathematical challenge.
If you are highly confident in your photo editing skills and know your destination country's precise mathematical specifications—such as the United States Department of State requirement of a minimum 600 × 600 pixel digital resolution for a 2 × 2 inch print—you might try sizing it yourself. Either way, our service, PhotoID24, will size and format your image to the exact target dimensions automatically — the fastest way to be sure it is correct.
However, the easiest and fastest solution is to skip the manual measuring entirely by using our professional service, PhotoID24. When you upload a standard photo taken from a slight distance, the system takes over the technical heavy lifting in minutes without requiring a studio visit.
Our service automatically detects your facial features, pinpointing the exact bottom of your chin and the true top of your head. It then cross-references this with the specific rules of your chosen country, calculates the correct ratio, adjusts the framing, and crops the image instantly. This automated precision ensures your photo meets the official technical requirements, providing you with a file that is perfectly formatted for digital submission or ready to print on standard photo paper.
The single best action you can take today to secure your application is to stop stressing over manual millimeter measurements. Set up your camera, capture a clear, well-lit image with plenty of background space around your shoulders and head, and let professional compliance software finalize the exact geometry.